sun joe pressure washer nozzle guide

Sun Joe Pressure Washer Nozzle Guide: A Comprehensive Overview (Updated 03/31/2026)

Navigating the world of Sun Joe pressure washer nozzles can be tricky, but this guide simplifies selecting the right tip for optimal cleaning performance.

GRONGU’s SPX3000-TPS kit offers a versatile 5-piece quick connect spray tip set, including 0°, 15°, 25°, 40°, and soap nozzles.

Sun Joe pressure washer nozzles are the key to unlocking the full potential of your cleaning machine. These interchangeable tips dictate the spray pattern, pressure, and overall effectiveness of your wash. Understanding the different nozzle types and their applications is crucial for achieving optimal results, preventing damage to surfaces, and ensuring safe operation.

Sun Joe offers a diverse range of nozzles, each designed for specific cleaning tasks. From powerful, pinpoint jets for stubborn grime to wider, gentler sprays for delicate surfaces, selecting the correct nozzle is paramount. The availability of universal kits, like the GRONGU SPX3000-TPS, further expands your options, providing compatibility across various Sun Joe models and even some other pressure washers.

This guide will delve into the intricacies of Sun Joe nozzles, explaining the significance of degree measurements and spray patterns, and providing a detailed overview of common nozzle types. We’ll also cover compatibility with popular SPX series models, troubleshooting tips, and essential safety precautions.

Understanding Nozzle Degrees & Spray Patterns

The degree of a Sun Joe pressure washer nozzle directly correlates to the width and intensity of its spray pattern. Lower degree nozzles, like 0-degree and 15-degree, concentrate the water pressure into a narrow, powerful stream, ideal for tackling stubborn dirt and grime. Conversely, higher degree nozzles – 25-degree, 40-degree – disperse the water over a wider area, delivering a gentler cleaning action suitable for more delicate surfaces.

A 0-degree nozzle creates a pencil-thin stream, while a 40-degree nozzle produces a fan-shaped spray. Understanding this relationship is vital for preventing damage. Using a low-degree nozzle on a fragile surface can cause etching or stripping, while a high-degree nozzle might not provide sufficient cleaning power for heavily soiled areas.

Universal nozzle kits, such as the GRONGU SPX3000-TPS, provide a range of degrees, offering versatility for various cleaning applications. Choosing the appropriate degree ensures efficient and effective cleaning without risking damage.

Common Sun Joe Nozzle Types

Sun Joe pressure washers commonly utilize several nozzle types, each designed for specific cleaning tasks. These include 0-degree, 15-degree, 25-degree, 40-degree, and soap nozzles. The 0-degree nozzle delivers a highly concentrated stream for intense cleaning, while the 15-degree offers a powerful, focused spray.

For versatile all-purpose cleaning, the 25-degree nozzle is a popular choice, and the 40-degree nozzle provides a gentler spray for rinsing and delicate surfaces. Soap nozzles are specifically designed for applying detergent, creating a foamy lather to lift dirt and grime.

Universal nozzle kits, like the GRONGU SPX3000-TPS, often bundle these common types, providing a comprehensive solution for various cleaning needs. Quick connect nozzles simplify switching between types, enhancing efficiency and convenience during cleaning projects.

0-Degree Nozzles: For Intense Cleaning

The 0-degree nozzle is the most powerful option available for Sun Joe pressure washers, delivering a highly concentrated, pencil-thin stream of water. This intense pressure makes it ideal for tackling stubborn dirt, grime, and stains on durable surfaces like concrete and metal.

However, extreme caution is necessary when using a 0-degree nozzle. Its concentrated force can easily damage softer materials such as wood, vinyl siding, or car paint. Always test in an inconspicuous area first and maintain a safe distance from the surface.

Due to its power, this nozzle is best suited for spot cleaning and removing deeply embedded dirt. Universal kits, such as the GRONGU SPX3000-TPS, include a 0-degree tip for these demanding cleaning applications.

15-Degree Nozzles: Powerful, Focused Spray

The 15-degree nozzle provides a powerful, yet slightly wider spray pattern than the 0-degree option, offering a balance between cleaning intensity and coverage; This makes it exceptionally effective for removing dirt and grime from surfaces like brick, stone, and heavily soiled siding.

While still capable of delivering significant pressure, the 15-degree nozzle is less likely to cause damage compared to its 0-degree counterpart. It’s a good choice for general-purpose cleaning tasks where a more focused spray is required.

Many universal nozzle kits, including the GRONGU SPX3000-TPS, feature a 15-degree tip as part of their comprehensive set, providing versatility for a range of cleaning projects around the home.

25-Degree Nozzles: Versatile All-Purpose Cleaning

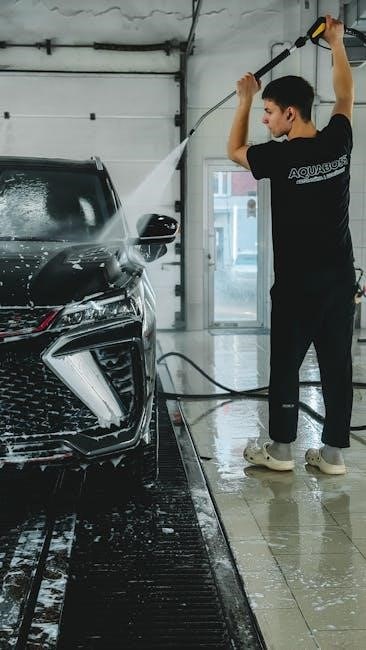
The 25-degree nozzle is often considered the go-to option for everyday pressure washing tasks, offering a fantastic balance between power and safety. It’s incredibly versatile, suitable for cleaning a wide array of surfaces including decks, patios, fences, and even vehicles.

This nozzle delivers a wider spray pattern than the 15-degree, reducing the risk of etching or damaging softer materials. It effectively removes dirt, mildew, and algae without being overly aggressive.

Because of its all-purpose nature, a 25-degree nozzle is almost always included in universal nozzle kits like the GRONGU SPX3000-TPS, making it an essential component for any Sun Joe pressure washer owner.

40-Degree Nozzles: Gentle Cleaning & Rinsing

The 40-degree nozzle is your best friend when dealing with delicate surfaces or tasks requiring a gentler touch. It provides the widest spray pattern of the commonly used nozzles, significantly reducing the pressure applied to any given area.

This makes it ideal for rinsing away soap and detergent residue after cleaning, as well as washing cars, boats, or even windows without fear of causing damage. It’s also excellent for cleaning fragile items like outdoor furniture or painted surfaces.

Like the 25-degree nozzle, the 40-degree tip is frequently included in universal kits such as the GRONGU SPX3000-TPS, ensuring you have the right tool for sensitive cleaning projects.

Sun Joe SPX Series Nozzle Compatibility

Understanding nozzle compatibility within the Sun Joe SPX series is crucial for maximizing your pressure washer’s potential. While many Sun Joe models utilize a quick-connect system, ensuring the nozzle you purchase is compatible with your specific model is paramount for a secure and effective cleaning experience.

The SPX3000, SPX2000, and SPX3500/3600 are popular models, but slight variations can exist. Universal nozzle kits, like the GRONGU SPX3000-TPS, are designed to fit a broad range of SPX series washers, offering convenience and versatility.

Always double-check product descriptions and customer reviews to confirm compatibility before purchasing. A properly fitted nozzle guarantees optimal pressure and spray pattern, leading to superior cleaning results and preventing potential damage to your machine.

SPX3000 Nozzle Guide

The Sun Joe SPX3000 pressure washer benefits greatly from utilizing the correct nozzle for each cleaning task. This model is frequently paired with universal nozzle kits like the GRONGU SPX3000-TPS, providing a comprehensive set of spray tips.

For heavy-duty grime, the 0-degree nozzle delivers a concentrated, powerful stream. The 15-degree nozzle is excellent for stubborn dirt on surfaces like concrete. A 25-degree nozzle offers a versatile, all-purpose cleaning solution for siding and decks. The 40-degree nozzle provides a wider, gentler spray ideal for rinsing vehicles or delicate surfaces.

Don’t forget the soap nozzle for efficient detergent application! Proper nozzle selection ensures effective cleaning without causing damage, maximizing the SPX3000’s performance.

SPX2000/2001 Nozzle Guide

Sun Joe SPX2000 and SPX2001 models, while slightly less powerful than the SPX3000, still benefit from optimized nozzle usage for various cleaning applications. These washers commonly utilize similar universal nozzle kits, enhancing their versatility.

The 0-degree nozzle should be used cautiously due to the concentrated pressure, ideal for removing stubborn stains from durable surfaces. A 15-degree nozzle effectively tackles dirt on patios and driveways. The 25-degree nozzle provides a balanced spray for general cleaning tasks around the home. Employ the 40-degree nozzle for rinsing cars or washing windows.

Remember to utilize the soap nozzle when applying detergents for a thorough clean. Selecting the appropriate nozzle maximizes cleaning efficiency and prevents potential damage to surfaces.

SPX3500/3600 Nozzle Guide

The Sun Joe SPX3500 and SPX3600 pressure washers, boasting increased PSI, demand careful nozzle selection to harness their power effectively and safely. These models are well-suited for more demanding cleaning projects, but require appropriate nozzle choices.

The 0-degree nozzle, with its intense stream, is best reserved for extremely stubborn grime on concrete or metal, used with caution. A 15-degree nozzle excels at removing dirt from siding and decks. The 25-degree nozzle offers a versatile option for general cleaning tasks. Utilize the 40-degree nozzle for rinsing larger areas or washing vehicles.

Don’t forget the soap nozzle for applying detergents, creating a rich lather for a deep clean. Always prioritize safety and surface compatibility when choosing a nozzle for these powerful washers.

Soap Nozzles & Detergent Application

Sun Joe soap nozzles are specifically designed for efficient detergent application, maximizing cleaning power while protecting your pressure washer. These nozzles create a lower-pressure, high-volume spray, ideal for distributing soap evenly across surfaces.

Typically, a soap nozzle is black or white and features a wider orifice than other spray tips. Always dilute detergents according to the manufacturer’s instructions to prevent damage to your machine or the surface being cleaned. Ensure the detergent is pressure washer safe.

When using a soap nozzle, select a lower pressure setting on your Sun Joe washer. Allow the detergent to dwell for a few minutes before rinsing with a wider spray pattern, like a 25 or 40-degree nozzle, to remove all traces of soap.

Quick Connect vs. Traditional Nozzles

Sun Joe pressure washers utilize both traditional and quick connect nozzle systems, each offering distinct advantages for user convenience and efficiency. Traditional nozzles screw directly onto the pressure washer’s wand, requiring manual tightening and loosening for tip changes.

Quick connect nozzles, like those found in the GRONGU SPX3000-TPS kit, feature a simple push-and-click mechanism, allowing for rapid nozzle swaps without tools. This significantly speeds up the cleaning process when switching between different spray patterns.

While traditional nozzles are generally more durable, quick connect systems prioritize ease of use. Compatibility is crucial; ensure any aftermarket nozzle kit is designed for your specific Sun Joe model. Quick connect systems are becoming increasingly popular due to their time-saving benefits.

Universal Nozzle Kits for Sun Joe Washers (e.g., GRONGU SPX3000-TPS)

Expanding beyond Sun Joe’s original nozzle selection, numerous universal kits offer enhanced versatility and value for your pressure washing needs. The GRONGU SPX3000-TPS is a popular example, designed for compatibility with the SPX3000 series and other universal pressure washers.

These kits typically include a range of spray angles – 0°, 15°, 25°, 40°, and soap – providing solutions for diverse cleaning tasks. They often feature a quick connect system for effortless nozzle changes, boosting efficiency during operation.

When selecting a universal kit, verify compatibility with your Sun Joe model. Consider the build quality and materials for durability. These kits represent a cost-effective way to broaden your cleaning capabilities.

Troubleshooting Nozzle Issues

Encountering problems with your Sun Joe pressure washer nozzles is common, but often easily resolved. Addressing these issues promptly ensures optimal cleaning performance and prolongs the life of your equipment.

Common problems include low pressure and nozzle clogging. Low pressure can stem from a partially blocked nozzle or an incorrect nozzle selection for the task. Clogging occurs when debris obstructs the nozzle’s opening, restricting water flow.

Regular inspection and cleaning are crucial preventative measures. For clogged nozzles, use a nozzle cleaning tool or soak them in vinegar to dissolve mineral deposits. Always disconnect the power source before attempting any maintenance.

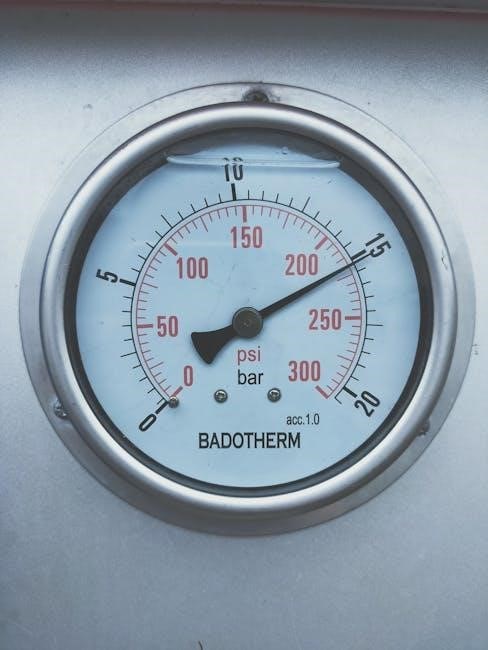
Low Pressure Troubleshooting

Experiencing low pressure with your Sun Joe pressure washer can be frustrating, but several factors can contribute to this issue. Systematic troubleshooting is key to restoring optimal cleaning power.

First, verify you’ve selected the appropriate nozzle for the job; a wider-degree nozzle naturally delivers lower pressure; Ensure the nozzle isn’t clogged with debris, as this significantly restricts water flow. Check the water supply – insufficient water volume to the pump will reduce pressure.

Inspect the high-pressure hose for kinks or damage, and confirm the pressure washer’s power cord is securely connected; If the problem persists, the pump itself might require professional attention. Regularly flushing the pump with clean water can help prevent future issues.

Nozzle Clogging & Cleaning

Clogged nozzles are a common issue with pressure washers, significantly reducing performance and spray effectiveness. Regular cleaning is crucial for maintaining optimal operation of your Sun Joe.

Begin by disconnecting the nozzle from the wand. Use a nozzle cleaning tool, a thin wire, or even a straightened paperclip to carefully dislodge any debris blocking the orifice. Avoid enlarging the opening, as this alters the spray pattern. For stubborn clogs, soaking the nozzle in white vinegar overnight can help dissolve mineral deposits.

Rinse the nozzle thoroughly with water after cleaning, ensuring all loosened debris is removed. Prevent future clogging by using a water filter on your supply line and flushing the system after each use.

Nozzle Storage & Maintenance

Proper storage and maintenance extend the life of your Sun Joe pressure washer nozzles and ensure consistent performance. After each use, thoroughly rinse all nozzles with clean water to remove any residual detergent or debris.

Allow the nozzles to air dry completely before storing them. Avoid storing them in damp environments, which can promote corrosion and clogging. A dedicated storage container or bag helps keep nozzles organized and protected from damage. Inspect nozzles regularly for cracks, wear, or deformation.

Replace any damaged nozzles promptly to maintain optimal spray patterns and cleaning power. Periodically check quick-connect fittings for proper function and lubricate if necessary.

Safety Precautions When Using Nozzles

Prioritizing safety is crucial when operating Sun Joe pressure washer nozzles. Always wear safety glasses or goggles to protect your eyes from debris and spray back. Closed-toe shoes are also essential for foot protection.

Never point the nozzle at yourself or others. Maintain a safe distance from surfaces being cleaned to avoid injury. Be mindful of the powerful force of the water stream, especially with 0-degree nozzles, which can cause significant damage.

Avoid using nozzles on electrical components or wiring. Ensure the pressure washer is properly grounded and that all connections are secure. Always disconnect the power source before changing nozzles or performing maintenance.

guided reading activity foundations of government lesson 2 answer key

This lesson explores diverse governmental systems, focusing on unitary, confederacy, and federal structures, alongside constitutional frameworks and authoritarianism’s characteristics.

A. Overview of Lesson 2: Types of Government

Lesson 2 delves into the fascinating world of governmental structures, providing a comparative analysis of how power is distributed and exercised across different nations. We begin by examining the unitary system, where central authorities hold supreme power, contrasting it with the confederacy, characterized by independent states retaining significant sovereignty.

A core focus is the federal system, a blend of both, dividing powers between national and regional entities. Understanding these distinctions is crucial, as each system impacts citizen rights and governmental efficiency. Furthermore, we’ll explore the vital role of constitutions in defining governmental limits and establishing foundational principles. Finally, we’ll briefly touch upon authoritarian governments, recognizing their distinct characteristics and implications for individual liberties. This lesson aims to equip you with a foundational understanding of these diverse systems.

B. Importance of Understanding Governmental Systems

Grasping the nuances of governmental systems is paramount for informed citizenship. Knowing whether a nation operates under a unitary, confederate, or federal model directly impacts how laws are made, enforced, and how citizens interact with their government. Understanding these structures allows for critical evaluation of policies and accountability of leaders.

Furthermore, recognizing the role of a constitution – establishing shared ideals and limiting governmental power – is essential for safeguarding individual liberties. Awareness of authoritarian tendencies versus constitutional boundaries empowers citizens to defend democratic principles. This knowledge isn’t merely academic; it’s fundamental to participating effectively in a democracy, advocating for change, and protecting fundamental rights. Ultimately, a solid understanding of governmental systems fosters a more engaged and responsible electorate.

II. Systems of Government: A Comparative Analysis

This section details unitary, confederacy, and federal systems, highlighting power distribution and sovereign state relationships, crucial for understanding governmental structures.

A. Unitary System

Definition of a Unitary System: A unitary system concentrates all key governmental powers within a central authority. This means the central government holds supreme power, and any regional or local governments derive their authority from it. Unlike federal or confederal systems, subnational units do not possess inherent sovereignty.

Characteristics of Unitary Governments

Unitary governments often exhibit streamlined decision-making processes, as policies are implemented consistently across the nation. They can be more efficient in responding to national crises and enacting uniform laws. However, this centralization can sometimes lead to a disconnect between the central government and local needs. Examples of countries with unitary systems include France, Japan, and the United Kingdom. The central government can choose to delegate powers to local entities, but it retains the ultimate authority and can revoke those powers at any time. This structure ensures national unity and consistent policy application throughout the country.

Definition of a Unitary System

A unitary system of government fundamentally centers power within a single, central authority. This core principle dictates that all significant governmental powers reside with the national government, effectively making it the supreme governing body. Regional or local governments, if they exist, operate as administrative extensions of the central government, deriving their authority solely from it.

Crucially, these subnational units do not possess inherent sovereignty or independent constitutional rights. The central government retains the power to create, alter, or abolish these local entities at its discretion. This contrasts sharply with federal systems where power is constitutionally divided. Essentially, a unitary system prioritizes national uniformity and centralized control, ensuring consistent policy implementation across the entire nation.

Unitary governments typically exhibit a high degree of centralization, streamlining decision-making processes and fostering national unity through consistent policies. A key characteristic is the central government’s ability to legislate on all matters, without requiring consent from regional bodies. This allows for swift and uniform implementation of laws and regulations nationwide.

Furthermore, these systems often feature a standardized legal code and administrative structure, minimizing regional variations. While local governments may handle day-to-day administration, their powers are delegated and can be revoked. This contrasts with federal systems where states retain constitutionally protected powers. Unitary systems prioritize national interests and efficiency, often found in countries with a long history of centralized rule, promoting a cohesive national identity.

B. Confederacy System

Confederate systems represent a stark contrast to unitary governments, prioritizing the sovereignty of individual states or regions. In this structure, key powers reside with the constituent states, and the central authority derives its legitimacy from them. The central government’s powers are limited and specifically delegated by the states, often focused on defense or foreign affairs.

A defining feature is the voluntary association of independent states, each retaining significant autonomy. States can often secede, highlighting the decentralized nature of the system. Historically, confederacies have proven unstable due to the inherent tension between state sovereignty and the need for collective action. The central government lacks direct authority over citizens, relying on states to enforce its policies. This system emphasizes regional independence, but can struggle with national unity and effective governance.

Definition of a Confederacy System

A confederacy system of government is fundamentally defined by its decentralized structure, where independent sovereign states retain ultimate authority. Unlike federal or unitary systems, a confederacy doesn’t grant significant inherent power to a central government. Instead, the central authority operates solely through the consent and delegation of powers from these independent states.

Essentially, it’s an alliance of independent states agreeing to cooperate on specific issues, such as defense or trade, but maintaining complete control over their internal affairs. This arrangement emphasizes state rights and self-determination. The central government’s power is limited to what the states explicitly allow, and states often retain the right to withdraw from the confederation. This makes it a fragile form of government, prioritizing state sovereignty above national unity.

Key Features of Confederate Governments

Confederate governments are characterized by several defining features, stemming from their emphasis on state sovereignty. A primary feature is the limited central authority, possessing only powers specifically delegated by the member states – often relating to defense or foreign affairs. States retain considerable autonomy, enacting and enforcing their own laws without substantial interference.

Another key aspect is the prevalence of unanimous consent requirements for major decisions. This means significant actions often require the agreement of all member states, hindering swift or decisive action. Furthermore, member states typically retain the right to secede, or withdraw, from the confederation, contributing to inherent instability. Finally, a weak central government often struggles to effectively collect taxes or enforce laws directly upon citizens, relying instead on contributions from the states.

C. Federal System

A federal system represents a unique blend of unitary and confederal characteristics, designed to balance national power with regional autonomy. It’s defined by a constitutionally established division of powers between a central (national) government and constituent political units – states or provinces.

This division isn’t absolute; both levels of government have defined spheres of authority. The national government typically handles matters of national defense, foreign policy, and interstate commerce, while states manage areas like education, local law enforcement, and intrastate trade. Crucially, both levels operate directly upon the citizens, creating a system of shared sovereignty.

Federalism aims to prevent tyranny by dispersing power, but can also lead to conflicts over jurisdictional boundaries. The specifics of power division vary significantly between federal nations, reflecting unique historical and political contexts.

Definition of a Federal System

A federal system of government is characterized by a constitutional division of powers between a central, national government and several regional governments – typically states or provinces. Unlike unitary systems where the central authority is supreme, and confederations where states retain ultimate sovereignty, federalism establishes a shared rule.

This means neither level of government is wholly subordinate to the other; each possesses defined powers granted to it by a constitution. This constitution serves as the supreme law, outlining the respective jurisdictions and resolving potential conflicts. Federal systems are often adopted in large, diverse countries to accommodate regional differences while maintaining national unity.

The key element is this deliberate power-sharing arrangement, fostering a balance between centralized efficiency and decentralized responsiveness to local needs.

Division of Powers in Federal Systems (National vs. State/Provincial)

In a federal system, powers are constitutionally divided, typically categorizing them as national (federal) and state/provincial. National governments generally handle areas like defense, foreign policy, and interstate commerce – matters requiring unified national action.

State or provincial governments, conversely, often manage issues closer to the people, such as education, local law enforcement, and intrastate commerce. However, this division isn’t absolute; powers can be concurrent, meaning both levels of government can act.

The Constitution, or equivalent foundational document, specifies these divisions, often employing the principle of enumerated powers for the national government – listing specific powers it possesses – and reserving all others to the states. This careful allocation aims to balance national strength with regional autonomy, preventing either level from becoming overly dominant.

III. Constitutional Governments: Limits and Frameworks

Constitutions establish governmental structure, powers, and duties, defining shared ideals and acting as the supreme law, limiting governmental authority through clear boundaries.

A. The Role of a Constitution

A constitution serves as the bedrock of a nation’s governance, meticulously outlining the fundamental principles and beliefs that unite its people. It’s more than just a legal document; it’s a statement of shared ideals, reflecting the collective values and aspirations of a society.

Crucially, a constitution establishes the basic structure of the government itself, defining its branches – typically legislative, executive, and judicial – and detailing their respective powers and responsibilities. It also clearly delineates the duties of government officials, ensuring accountability and preventing arbitrary exercise of authority.

Perhaps most importantly, the constitution provides the supreme law for the country, meaning that all other laws and governmental actions must conform to its provisions. This establishes a hierarchy of legal authority, safeguarding against inconsistencies and ensuring a stable legal framework. Without a constitution, governance risks becoming chaotic and unpredictable, lacking a firm foundation in established principles.

Establishing Shared Ideals

Constitutions aren’t solely legal frameworks; they embody a nation’s core beliefs. They articulate the fundamental principles upon which the government and society are built, serving as a unifying force for citizens. These ideals often encompass concepts like liberty, equality, justice, and the pursuit of happiness, reflecting a collective vision for the future.

By explicitly stating these shared values, a constitution fosters a sense of national identity and purpose. It provides a common ground for citizens, even amidst diverse backgrounds and perspectives. These ideals act as guiding stars, influencing policy decisions and shaping the overall character of the nation.

Furthermore, enshrining these principles in a foundational document protects them from the whims of temporary political majorities, ensuring their enduring relevance across generations. This commitment to shared ideals is vital for long-term stability and societal cohesion.

Defining Government Structure, Powers, and Duties

A constitution meticulously outlines the framework of government, establishing its branches – typically legislative, executive, and judicial – and defining their respective roles. It clarifies the relationships between these branches, ensuring a system of checks and balances to prevent any single entity from accumulating excessive power.

Beyond structure, a constitution precisely delineates the powers granted to the government, specifying what it can and cannot do. This includes defining areas of authority, such as national defense, foreign policy, and interstate commerce. Simultaneously, it outlines the duties and responsibilities of government officials, holding them accountable to the law.

This clear articulation of powers and duties is crucial for preventing arbitrary rule and protecting individual liberties. It provides a roadmap for governance, ensuring transparency and predictability in the exercise of governmental authority, ultimately serving as the supreme law for the country.

B. Limited Government & Constitutional Boundaries

Constitutional governments inherently embody the principle of limited government, meaning governmental power is not absolute. Instead, it operates within clearly defined boundaries established by the constitution itself. These boundaries safeguard citizens from potential governmental overreach and protect fundamental rights and freedoms.

Constitutions achieve this limitation through various mechanisms, including the enumeration of specific powers, the reservation of powers to the people or the states, and the inclusion of bills of rights guaranteeing individual liberties. These provisions act as constraints on governmental action, preventing it from infringing upon protected rights.

Furthermore, the concept of the “Supreme Law of the Land” reinforces these boundaries. Any law or governmental action that contradicts the constitution is deemed invalid, ensuring the constitution remains the ultimate authority and upholding the principles of limited government.

How Constitutions Limit Governmental Power

Constitutions strategically limit governmental power through several key mechanisms. Primarily, they explicitly define the scope of governmental authority, outlining specific powers granted to different branches and levels of government. This enumeration prevents arbitrary exercises of power beyond those expressly authorized.

Secondly, constitutions often reserve powers not specifically granted to the government to the people or to state/provincial governments, fostering a balance of authority. Bills of rights, commonly included within constitutions, further restrict governmental action by guaranteeing fundamental individual rights – such as freedom of speech, religion, and assembly – that the government cannot infringe upon.

Finally, the establishment of judicial review empowers courts to invalidate laws or actions deemed unconstitutional, providing a crucial check on governmental overreach and reinforcing constitutional boundaries.

The Concept of Supreme Law of the Land

The principle of a constitution serving as the “supreme law of the land” is foundational to constitutional governments. This means that the constitution stands as the highest legal authority within a country, superseding all other laws, rules, and governmental actions.

Any law or action – whether enacted by the legislature, executive branch, or even a state government – that conflicts with the constitution is deemed invalid and unenforceable. This hierarchy ensures consistency and stability within the legal system, preventing arbitrary rule and protecting fundamental rights.

The concept establishes a clear framework for resolving legal disputes, with courts ultimately interpreting the constitution to determine the validity of laws and actions. It reinforces the idea that government itself is subject to the law, not above it, and safeguards against potential tyranny.

IV. Major Types of Government: Authoritarianism

Authoritarian governments concentrate power in a single entity, often suppressing opposition and limiting individual freedoms, differing greatly from democratic ideals.

A. Defining Authoritarian Governments

Authoritarian governments represent a stark contrast to democratic systems, characterized by a centralized control structure where citizens possess limited participation in political decision-making. These regimes often prioritize order and stability, frequently achieved through suppression of dissent and strict regulation of public life. Unlike constitutional governments with defined limits, authoritarian rule often lacks clear boundaries on governmental power.

Key features include limited political pluralism, meaning few, if any, independent political organizations are permitted to operate freely. Elections, if held, are often not genuinely competitive or free from manipulation. Individual rights and freedoms, such as freedom of speech, assembly, and the press, are frequently curtailed or entirely absent. The rule of law may be selectively applied, favoring those aligned with the ruling power.

These governments may employ various methods to maintain control, including propaganda, surveillance, and the use of force. While not always overtly totalitarian, authoritarian regimes consistently demonstrate a preference for control over individual liberty and political participation.

B. Characteristics of Authoritarian Rule

Authoritarian rule consistently exhibits several defining characteristics, differentiating it from more open governmental systems. A prominent feature is strong central power, often vested in a single leader or a small elite group, with minimal checks and balances. Political opposition is typically suppressed, either through legal restrictions, intimidation, or outright repression, hindering the development of alternative viewpoints.

Control over information is paramount, with state-controlled media and censorship employed to shape public opinion and limit access to dissenting voices. Economic control may also be significant, with the government heavily influencing or directly owning key industries. Individual freedoms, including freedom of speech, assembly, and religion, are often severely restricted.

Furthermore, a culture of fear and obedience is frequently cultivated, discouraging independent thought and action. While the level of control can vary, the overarching theme is a prioritization of state authority over individual rights and liberties, resulting in a system where accountability is limited and citizen participation is discouraged.

V. Review Questions & Key Takeaways

Reflecting on Lesson 2, several core concepts emerge as crucial for understanding governmental structures. We’ve explored how power distribution defines systems – unitary concentrating authority centrally, confederacies granting sovereignty to states, and federalism dividing powers between national and regional entities.

Constitutional governments establish frameworks limiting governmental power through defined structures and supreme laws, ensuring accountability. Conversely, authoritarian regimes prioritize state control, suppressing dissent and restricting individual freedoms. Recognizing these distinctions is vital.

Key takeaways include the understanding that no single system is universally superior; each possesses strengths and weaknesses depending on societal context. A constitution’s role in safeguarding liberty and limiting power is paramount. Finally, identifying the characteristics of authoritarianism allows for critical evaluation of political systems and defense of democratic principles.

postmark pdf attachment

Understanding Postmark and PDF Attachments

Postmark excels at transactional emails, offering reliable delivery and detailed analytics, while seamlessly integrating PDF attachments for crucial documents like invoices.

Several platforms, including Elastic Email and Vestorly, alongside Postmark, facilitate sending emails with PDF attachments, catering to diverse business communication needs.

The UPU/EPM standard, relevant to electronic signatures, intersects with Postmark’s capabilities, ensuring compliance when sending legally binding PDF documents.

What is Postmark?

Postmark is a robust, cloud-based transactional email service meticulously designed for developers and businesses prioritizing reliable email delivery. Unlike mass email marketing platforms, Postmark specializes in automated, one-to-one emails – think password resets, shipping notifications, and, importantly, documents like PDF invoices. It’s built for sending critical, time-sensitive communications that directly impact user experience and business operations.

Several providers, including Elastic Email, Vestorly, and COPERNICA, offer similar services, but Postmark distinguishes itself through its focus on deliverability and detailed analytics. It provides insights into bounces, opens, and clicks, allowing for continuous optimization of email campaigns. The platform’s API-first approach makes integration with various applications, such as MedusaJS, straightforward, enabling seamless PDF attachment functionality.

Furthermore, Postmark’s adherence to standards like UPU/EPM (related to electronic signatures) demonstrates its commitment to secure and compliant email communication, crucial when handling sensitive PDF documents.

Postmark’s Role in Transactional Emails

Postmark fundamentally excels in transactional emails – automated, personalized messages triggered by user actions. This contrasts with bulk marketing emails, focusing instead on critical communications like order confirmations, account notifications, and the delivery of important documents, often as PDF attachments. Its architecture prioritizes deliverability, ensuring these vital emails reach the intended recipient’s inbox reliably.

The platform’s strength lies in its API-centric design, facilitating seamless integration with various applications. This is particularly relevant when incorporating PDF attachments, as developers can programmatically attach files to emails triggered by specific events. Platforms like MedusaJS leverage Postmark’s API for robust transactional email support, including PDF delivery.

Moreover, Postmark’s commitment to standards like UPU/EPM ensures compliance when transmitting legally significant PDF documents, reinforcing trust and security in transactional communications.

Why Use Postmark for Email with Attachments?

Choosing Postmark for emails containing PDF attachments offers distinct advantages. Its reputation for high deliverability minimizes the risk of important documents landing in spam folders, crucial for invoices or legal agreements. Unlike some alternatives, Postmark maintains full backward compatibility with its API, ensuring existing integrations continue functioning smoothly even with attachments.

Furthermore, Postmark’s robust infrastructure handles attachments efficiently, supporting various file types, including PDFs; While size limits apply, the platform provides clear guidelines for optimization. The availability of plugins, like the Rich Postmark Emails Plugin (SelectPDF), simplifies PDF generation and attachment directly within workflows.

Compared to platforms like SendGrid, some users find Postmark superior in terms of setup and reliability for transactional emails with PDFs, making it a preferred choice for critical communications.

Preparing Your PDF for Attachment

Optimizing PDFs for email delivery via Postmark involves reducing file size and ensuring compatibility, maximizing deliverability and user experience.

PDF Optimization for Email Delivery

PDF optimization is crucial when utilizing Postmark for email attachments, directly impacting deliverability and recipient experience. Large PDF files significantly increase email size, potentially triggering spam filters and causing delays. Reducing file size without compromising quality is paramount;

Techniques include image compression, removing unnecessary elements, and utilizing PDF optimization tools. Consider flattening layers and embedding only necessary fonts. Aim for a file size under 5MB, aligning with common attachment size limits.

Furthermore, ensure the PDF is linearised for faster viewing, allowing recipients to begin reading before the entire file downloads. Proper optimization not only enhances deliverability but also demonstrates professionalism and respect for recipient bandwidth, fostering positive engagement with your communications sent through Postmark;

Ensuring PDF Compatibility

PDF compatibility is vital when sending attachments via Postmark to guarantee all recipients can readily access your documents. While PDF is a widely supported format, variations in PDF versions and reader software can cause rendering issues.

To maximize compatibility, save your PDF as PDF/A, an archival standard designed for long-term preservation and consistent viewing across platforms. Avoid using advanced features like JavaScript or complex encryption, which may not be supported by all email clients or PDF readers.

Testing your PDF across different email clients (Gmail, Outlook, etc.) and operating systems is highly recommended. Ensuring broad compatibility minimizes frustration and ensures your message, delivered through Postmark, is received as intended, maintaining a professional image.

Attaching PDFs with Postmark: Methods & Techniques

Postmark supports PDF attachments through its API, plugins like MedusaJS, and tools like Rich Postmark Emails (SelectPDF), offering versatile integration options.

Using the Postmark API for PDF Attachments

Postmark’s API provides a direct method for attaching PDF files to emails, offering granular control over the sending process. Developers can utilize the API to programmatically include PDF documents as attachments, specifying the file name and content type (application/pdf) within the request.

The API’s backwards compatibility ensures that existing integrations remain functional even with attachment additions. When constructing the API request, the PDF content must be appropriately encoded, typically using Base64 encoding, to ensure proper transmission and decoding by the recipient’s email client.

Successful implementation requires careful handling of file size limits imposed by Postmark to avoid delivery failures. Thorough testing is crucial to verify that the PDF attachments are correctly rendered and accessible across various email clients and platforms, guaranteeing a seamless user experience.

This method is ideal for automated workflows and dynamic PDF generation.

Postmark Plugins and Integrations for PDF Support (MedusaJS Example)

Several plugins and integrations simplify attaching PDF files to emails sent via Postmark, particularly within e-commerce platforms like MedusaJS. These tools abstract the complexities of the Postmark API, providing a user-friendly interface for managing attachments.

The MedusaJS Postmark plugin, for instance, offers robust transactional email support, including the ability to attach dynamically generated PDF documents – such as invoices or order confirmations – directly within abandoned cart workflows or other automated email sequences.

These integrations often handle the necessary encoding and content-type specifications, streamlining the development process. Utilizing plugins reduces the need for custom API implementations, accelerating time-to-market and minimizing potential errors. They also frequently provide features for managing attachment size and ensuring deliverability.

This approach is beneficial for developers seeking a quicker setup.

Attaching PDFs via Rich Postmark Emails Plugin (SelectPDF)

The Rich Postmark Emails Plugin, particularly when integrated with SelectPDF, provides a powerful solution for generating and attaching PDF files directly within your email workflows. This combination allows for dynamic PDF creation, eliminating the need for pre-existing files and enabling personalized document generation.

This method is especially useful for scenarios requiring customized reports, invoices, or agreements. It simplifies the process of creating and sending professional-looking PDF attachments, enhancing customer communication and streamlining business operations. Developers can leverage this integration to automate document delivery within their applications.

It’s a streamlined approach to document delivery.

Troubleshooting Attachment Issues

Postmark attachment problems often stem from size limits or incorrect Content-Type declarations (ensure application/pdf). Backwards compatibility is fully maintained.

Attachment Size Limits in Postmark

Postmark enforces strict attachment size limitations to maintain optimal deliverability and server performance. Understanding these limits is crucial for successfully sending PDF documents via transactional emails. While specific limits can evolve, it’s essential to consult the latest Postmark documentation for precise details.

Generally, Postmark restricts the total size of all attachments within a single email, including the email body itself. Exceeding these limits will result in email delivery failures. Developers should implement robust error handling to gracefully manage scenarios where attachments are too large, providing informative feedback to users.

Strategies for mitigating size issues include optimizing PDF files for size (reducing image resolution, removing unnecessary elements), or exploring alternative methods for delivering large documents, such as providing download links to files hosted on cloud storage services. Careful consideration of attachment size is a key component of a successful email marketing strategy.

Content-Type Considerations for PDF Attachments (application/pdf)

When attaching PDF documents with Postmark, correctly specifying the Content-Type header is paramount for proper email client interpretation. The standard and universally recognized Content-Type for PDF files is “application/pdf”. Incorrectly setting this header can lead to browsers attempting to display the PDF inline (potentially causing rendering issues) or, worse, failing to recognize the attachment altogether.

Postmark’s API and integrations generally handle this automatically when a PDF file is correctly provided as an attachment. However, when constructing emails manually or through custom integrations, explicitly setting the Content-Type to “application/pdf” is vital.

Ensuring the correct Content-Type guarantees that email clients will prompt users to download the PDF file, preserving the intended user experience and preventing potential display errors. Consistent adherence to this standard is a best practice for reliable PDF delivery.

Backward Compatibility with Postmark API

Postmark prioritizes maintaining backward compatibility within its API, ensuring existing integrations aren’t disrupted by new features or updates. This is particularly relevant when implementing PDF attachment functionality. Developers can confidently integrate PDF attachments knowing that code designed for older API versions will continue to function seamlessly.

Specifically, the API changes haven’t impacted sending emails without attachments, meaning existing email workflows remain unaffected when PDF support is added. This allows for a phased rollout of PDF attachment features without requiring a complete overhaul of existing systems.

Postmark’s commitment to backward compatibility simplifies the integration process and minimizes the risk of unexpected downtime, making it a reliable choice for transactional emails with PDF attachments.

Advanced Considerations

PDF security, deliverability, and exploring alternatives like SendGrid are vital when using Postmark for attachments, ensuring optimal email performance.

Security Best Practices for PDF Attachments

Prioritizing security is paramount when sending PDF attachments via Postmark. Always scan PDF files for malware before attachment, safeguarding recipients from potential threats. Implement strong password protection for sensitive documents, requiring recipients to authenticate before access.

Consider digitally signing PDFs to verify authenticity and prevent tampering, assuring recipients of the document’s integrity. Regularly update Postmark and related plugins to patch security vulnerabilities. Be mindful of data privacy regulations, like GDPR, when handling personal information within PDF attachments.

Avoid embedding executable content within PDFs, as this can be exploited by malicious actors. Educate users about phishing attempts and the importance of verifying sender identities before opening attachments. Employ encryption methods to protect PDF content during transit and at rest, bolstering overall security posture.

Email Deliverability and PDF Attachments

Maintaining high deliverability with Postmark and PDF attachments requires careful attention to detail. Large PDF file sizes significantly impact deliverability rates; optimize PDFs for web viewing to reduce their footprint. Avoid exceeding Postmark’s attachment size limits, which can lead to bounces or filtering as spam.

Ensure proper Content-Type declaration (application/pdf) for accurate interpretation by email clients. Monitor bounce rates and feedback loops to identify and address deliverability issues promptly. Authenticate your domain with SPF, DKIM, and DMARC to enhance sender reputation.

Test email rendering across various clients to confirm PDF attachments display correctly. Avoid using spam trigger words in the email body and PDF content. Regularly review Postmark’s deliverability documentation for best practices and updates.

Alternatives to Postmark for PDF Attachment Emails (SendGrid)

While Postmark is a strong contender, SendGrid presents a viable alternative for sending emails with PDF attachments. SendGrid, like Postmark, offers robust APIs and detailed analytics, enabling effective transactional email campaigns. Both platforms support attaching files, but their pricing structures and feature sets differ;

SendGrid provides a wider range of marketing email features alongside transactional capabilities, potentially appealing to businesses needing both. However, Postmark often prioritizes deliverability and simplicity for transactional messaging. Consider your specific needs – volume, features, and budget – when choosing.

Users have reported success attaching PDFs from Xano to SendGrid, though some prefer Postmark’s ease of setup; Laravel and Symfony frameworks offer drivers for both, simplifying integration.

Postmark and UPU Standards

Postmark interacts with UPU/EPM standards, crucial for electronic signatures within PDF attachments, ensuring legal validity and international email compliance.

UPU/EPM and Electronic Signatures

The Universal Postal Union (UPU) Electronic Postmark (EPM) standard plays a vital role when utilizing Postmark for sending PDF documents requiring electronic signatures. This standard aims to provide a legally recognized timestamp and authentication method for electronic communications, particularly important for documents like contracts or official notices distributed via email.

When attaching digitally signed PDF files through Postmark, adherence to UPU/EPM guidelines can bolster the document’s admissibility as evidence. The EPM essentially creates a secure audit trail, verifying the document’s integrity and the time of signing. This is especially relevant in international contexts where legal frameworks surrounding electronic signatures can vary significantly.

Ensuring compatibility with UPU/EPM standards when integrating Postmark with digital signature solutions is crucial for maintaining the legal enforceability of your PDF attachments. Proper implementation guarantees that the electronic signature is recognized and validated across different jurisdictions, streamlining business processes and reducing potential legal disputes.

Real-World Use Cases

Postmark efficiently delivers invoices as PDF attachments, streamlines contract distribution, and facilitates secure document sharing, enhancing business communication workflows effectively.

Sending Invoices via Postmark with PDF Attachments

Postmark provides a robust solution for automating invoice delivery, directly integrating PDF attachments into transactional emails. This ensures customers receive timely and professional invoices, improving payment cycles and reducing administrative overhead. Utilizing the Postmark API, developers can dynamically generate and attach PDF invoices triggered by events like order completion or subscription renewals.

The Rich Postmark Emails Plugin (SelectPDF) offers a streamlined approach, simplifying the process of embedding dynamically generated PDF files. Furthermore, compatibility is maintained with previous API versions, allowing for seamless transitions and avoiding disruptions to existing workflows. Prioritizing security, businesses should implement best practices when handling sensitive financial data within PDF attachments, safeguarding customer information.

Optimizing PDF size is crucial for deliverability, adhering to Postmark’s attachment limits and ensuring a positive user experience. Properly configured content types (application/pdf) are essential for correct rendering across various email clients.

Posted in PDF

simpson 3100 psi pressure washer manual

Simpson 3100 PSI Pressure Washer Manual: Article Plan

This comprehensive guide details the Simpson 3100 PSI pressure washer, covering model MS60763-S and variations. It provides instructions, safety precautions, and troubleshooting steps for optimal performance.

The Simpson 3100 PSI pressure washer is a powerful cleaning tool designed for residential use. This model, including the MS60763-S, delivers 3100 PSI at 2.4 GPM, effectively tackling various outdoor cleaning tasks. It’s ideal for decks, patios, and vehicles, offering a balance of performance and affordability.
This manual provides essential information for safe and efficient operation, maintenance, and troubleshooting, ensuring a long lifespan for your pressure washer;

Model Numbers and Variations

The core model discussed is the MS60763-S, a 3100 PSI, 2.4 GPM gas-powered pressure washer. However, variations exist within the Simpson MegaShot series. These may include slight differences in accessories or component sourcing, but generally maintain the same performance specifications. Always refer to the specific model number on your unit when ordering parts or contacting customer service for accurate support.

MS60763-S and Related Models

The MS60763-S is a popular residential model, known for its balance of power and affordability. Related models, like the MS61217, share similar specifications – around 3100 PSI and 2.4 GPM – but might feature different pump or engine configurations. Checking the serial number ensures compatibility when sourcing replacement parts or accessing specific troubleshooting guides for your particular unit.

Safety Precautions

Always prioritize safety when operating this pressure washer. Wear safety glasses to protect your eyes from debris. Avoid directing the high-pressure spray at people, animals, or electrical connections. Never modify the pressure washer or use incompatible parts. Ensure proper ventilation when operating the engine, and disconnect the spark plug before maintenance.

General Safety Guidelines

Read the entire manual before using the Simpson 3100 PSI pressure washer. Understand all controls and safety features. Keep children and bystanders away from the operating area. Never leave the machine unattended while running. Wear appropriate clothing, including closed-toe shoes, and avoid loose garments. Inspect the equipment before each use.

High-Pressure Spray Safety

Never point the wand at yourself or others. The high-pressure spray can cause serious injury. Avoid spraying electrical components or outlets. Do not attempt to modify the gun or wand. Always release pressure before disconnecting hoses or nozzles. Be mindful of the spray’s recoil force and maintain a firm grip.

Component Identification

The Simpson 3100 PSI unit features a robust engine, high-pressure pump, and durable spray gun. Key components include various quick-connect nozzles, a high-pressure hose, and a detergent tank. Familiarize yourself with the throttle, choke, and on/off switch locations for safe and efficient operation. Understanding each part is crucial.

Nozzle Selection and Usage

Simpson pressure washers utilize quick-connect nozzles, each delivering a different spray pattern. A 0° nozzle provides a concentrated stream for tough stains, while a 40° nozzle offers a wider fan for general cleaning. Always select the appropriate nozzle for the task to avoid damage. Test in an inconspicuous area first!

Hose and Wand Assembly

Proper hose and wand connection is crucial for safe operation. Ensure the high-pressure hose is securely attached to both the pump and the spray gun. The wand then connects to the spray gun, utilizing a quick-connect mechanism. Verify all connections are tight before starting the engine to prevent leaks and potential injury.

Assembly Instructions

Before initial use, careful assembly is required. This includes attaching the high-pressure hose to the pump outlet, ensuring a secure and leak-proof connection. Next, connect the spray wand to the trigger gun, again verifying a firm fit. Finally, select and attach the desired nozzle to the wand, readying the unit for operation.

Attaching the Hose to the Pump

Securely connect the high-pressure hose to the pump outlet, hand-tightening initially. Then, use a wrench to tighten further, ensuring a watertight seal. Avoid over-tightening, which could damage the fittings. Inspect the connection for any leaks before operation; a loose connection can cause pressure loss and potential injury.

Connecting the Wand and Nozzle

Attach the desired nozzle to the spray wand, ensuring it clicks securely into place. Then, connect the wand to the trigger gun, again verifying a firm connection. Always select the appropriate nozzle for the cleaning task to avoid damage. Never attempt to modify or bypass safety features during nozzle installation.

Operating Instructions

Before starting, ensure all connections are secure and the unit has sufficient oil. Begin by turning on the water supply, then pull the starter cord to ignite the engine. Adjust the throttle for desired pressure, referencing the manual for specific nozzle settings. Always maintain a safe distance from surfaces during operation.

Starting the Engine

Ensure the fuel valve is open and the choke is set to the ‘start’ position. Gently pull the starter cord until resistance is felt, then pull briskly. Repeat if necessary, adjusting the choke as the engine warms. Once running, gradually reduce choke and adjust throttle for optimal performance. Refer to the manual for detailed guidance.

Adjusting Pressure Settings

Utilize the unloader valve to regulate pressure, starting with a lower setting for delicate surfaces. Gradually increase pressure as needed, testing on an inconspicuous area first. Different nozzles also affect pressure; wider nozzles deliver lower pressure. Always prioritize safety and consult the manual for specific nozzle recommendations and pressure guidelines.

Maintenance and Care

Regular maintenance ensures longevity. Clean nozzles after each use to prevent clogging, and inspect the hose for damage. Perform oil changes according to the schedule in the manual – typically after every 50 hours of operation. Store the unit in a dry place, protecting it from freezing temperatures to avoid component damage.

Cleaning the Nozzles

Clogged nozzles reduce performance. Remove nozzles and soak them in a nozzle cleaning solution or white vinegar overnight. Use a small wire or pin to gently clear any remaining debris from the nozzle orifice. Always inspect for wear and replace damaged nozzles promptly to maintain optimal spray patterns and pressure.

Oil Change Procedures

Regular oil changes are crucial for engine longevity. Drain the old oil while the engine is warm, but not hot. Replace the oil filter with a new one, and refill with the recommended oil type (check your manual). Dispose of used oil responsibly at a recycling center. Maintain proper oil levels for peak performance.

Troubleshooting Common Issues

Addressing problems promptly ensures continued operation. If the engine won’t start, check fuel levels, spark plug, and air filter. For pressure loss, inspect the nozzle for clogs, verify hose connections, and ensure adequate water supply. Consult the manual for detailed diagnostics and solutions to common malfunctions.

Engine Won’t Start

A non-starting engine requires systematic checks. First, verify sufficient fuel and a clean air filter. Inspect the spark plug for fouling or damage, replacing if necessary. Ensure the choke is properly positioned. If issues persist, consult the Simpson manual for specific troubleshooting steps related to the engine’s starting mechanism.

Pressure Loss Problems

Reduced pressure often indicates a blockage. Check the nozzle for clogs and clean thoroughly. Inspect the high-pressure hose for kinks or damage, and verify proper connections. A worn pump or faulty unloader valve can also cause pressure loss; consult the Simpson manual for detailed diagnostics and potential repair solutions.

Warranty Information

Simpson offers a warranty on the 3100 PSI pressure washer, covering manufacturing defects. Registration at www.power-washer.us is crucial for validation. Coverage details, including duration and limitations, are outlined in the full manual. Retain your purchase receipt for warranty claims and customer service inquiries.

Registration Process (www.power-washer.us)

Visit www.power-washer.us to register your Simpson 3100 PSI pressure washer. You’ll need the purchase date and serial number, found on the unit. Registration validates your warranty and provides access to replacement parts and service representatives. This ensures efficient support should you encounter any issues with your new pressure washer.

Coverage Details

Simpson’s warranty covers defects in materials and workmanship for a specified period. The duration varies based on the component; refer to the full warranty documentation for specifics. Warranty service requires proof of purchase and registration. Damage from misuse, neglect, or unauthorized repairs is not covered. Contact customer service for claim procedures.

Technical Specifications

The Simpson 3100 PSI pressure washer delivers 3100 pounds per square inch (PSI) with a flow rate of 2.4 gallons per minute (GPM). Engine specifications include a gasoline-powered motor, designed for residential use. Detailed engine displacement and horsepower information can be found within the complete manual.

PSI and GPM Output (3100 PSI, 2.4 GPM)

This Simpson model boasts a powerful 3100 PSI, effectively removing tough dirt and grime. The 2.4 GPM flow rate balances cleaning power with water conservation. These specifications make it ideal for various tasks, including deck cleaning, vehicle washing, and patio restoration, offering efficient performance for homeowners.

Engine Specifications

The Simpson 3100 PSI pressure washer is equipped with a reliable gasoline engine, designed for robust performance. While specific engine details vary, it generally features a straightforward starting system and durable construction. This ensures consistent power delivery for effective cleaning, making it a dependable choice for residential use.

Replacement Parts

Maintaining your Simpson 3100 PSI pressure washer is easy with readily available replacement parts. Commonly replaced components include nozzles, hoses, and filters, ensuring continued optimal performance. Visit www.power-washer.us to locate parts or contact customer service for assistance. Genuine Simpson parts guarantee compatibility and longevity for your cleaning equipment.

Where to Find Replacement Parts

Genuine Simpson replacement parts can be conveniently sourced online at www.power-washer.us. This website offers a comprehensive catalog and easy ordering process. Alternatively, contact Simpson’s Customer Service Department at 1-877-362-4271 for assistance locating specific components. Authorized service centers also stock frequently requested parts for quick repairs.

Commonly Replaced Components

Frequently replaced parts include nozzles, as they wear with use, and the high-pressure hose, susceptible to kinks and damage. The trigger gun and wand are also common replacements. Regularly inspect and replace the oil filter during maintenance. Occasionally, the pump itself may require servicing or complete replacement for continued optimal function.

Customer Support

For assistance with your Simpson 3100 PSI pressure washer, contact their dedicated Customer Service Department at 1-877-362-4271. Extensive online resources, including FAQs and support documentation, are available at www.simpsoncleaning.com. Registering your product at www.power-washer.us streamlines access to parts and service information, ensuring a positive ownership experience.

Contacting Simpson Customer Service (1-877-362-4271)

Reach Simpson’s knowledgeable support team directly by calling 1-877-362-4271. Representatives are available to assist with troubleshooting, parts inquiries, and warranty claims related to your 3100 PSI pressure washer. Be prepared to provide your model number and purchase date for efficient service and resolution of any concerns.

Online Resources (www.simpsoncleaning.com)

Visit www.simpsoncleaning.com for a wealth of support materials for your 3100 PSI pressure washer. Access downloadable manuals, frequently asked questions, replacement parts diagrams, and registration forms for warranty coverage. The website provides comprehensive resources to maximize your cleaning experience and maintain optimal performance.

Frequently Asked Questions (FAQ)

Common questions include troubleshooting starting issues, addressing pressure loss, and identifying appropriate nozzle selections. Users frequently inquire about oil change intervals and winterization procedures. The FAQ section also covers warranty registration and locating nearby service centers for assistance with your Simpson 3100 PSI model.

Additional Resources

For detailed information, consult the Simpson Premium Pressure Washer Instruction Manual. Explore online resources at www.simpsoncleaning.com and www.power-washer.us for warranty registration, replacement parts, and service representative support. These platforms offer expanded guidance beyond this quick-start guide.

Simpson Premium Pressure Washer Instruction Manual (Detailed Information)

The full Simpson manual provides exhaustive details on operation, maintenance, and safety. It covers all aspects, from initial setup and nozzle selection to troubleshooting complex issues. Accessing this resource ensures a thorough understanding of your 3100 PSI pressure washer, maximizing its lifespan and performance.

lg g3 instruction manual

What’s in the Box

Upon unboxing your new LG G3, carefully inspect the contents. You should find the LG G3 smartphone itself, alongside a quick start guide to help with initial setup. A USB cable is included for data transfer and charging purposes. Additionally, a charger adapter allows you to power up your device. Some packages may also contain earphones for immediate audio enjoyment. Retain the original packaging for potential warranty claims or future transport, ensuring all components are present.

LG G3 Key Features Overview

The LG G3 boasts a stunning display and powerful performance. Key features include its high-resolution camera for capturing detailed photos and videos. It offers robust connectivity options, such as Wi-Fi and Bluetooth, for seamless data sharing. The user interface is designed for intuitive navigation and customization. Explore advanced settings to personalize your experience. Benefit from regular software updates ensuring optimal functionality and security. The G3 delivers a blend of style, innovation, and user-friendly operation.

Setting Up Your LG G3

LG G3 setup involves inserting SIM/microSD cards, charging the battery, and powering on the device for initial configuration, as detailed in the manual.

Inserting SIM and microSD Card

To insert a SIM card, locate the tray on the side of your LG G3, typically requiring a SIM ejector tool. Gently open the tray and place the SIM card into the designated slot, ensuring correct orientation.

For microSD card expansion, use the same tray, finding the separate slot for the microSD card. Insert the card carefully until it clicks into place.

Always power off your device before inserting or removing cards to prevent damage. Refer to the LG G3 manual for detailed diagrams and safety precautions regarding SIM and microSD card installation.

Charging the Battery

To charge your LG G3, connect the provided USB cable to the charging port on the device and a compatible power adapter or computer. A charging indicator will appear on the screen, displaying the battery level.

Initial charging may take several hours to reach full capacity.

The LG G3 manual recommends using only the supplied charger to avoid potential damage. Avoid extreme temperatures during charging and disconnect the charger once the battery is fully charged for optimal battery health and longevity.

Powering On and Initial Setup

To power on your LG G3, press and hold the power button located on the rear of the device until the LG logo appears. The initial setup will guide you through selecting your language, connecting to a Wi-Fi network, and signing in to your Google account.

Follow the on-screen prompts to configure your preferences and restore data from a previous backup, if available. Refer to the LG G3 manual for detailed instructions.

Understanding the User Interface

The LG G3’s user interface offers intuitive navigation, customizable home screens, and a convenient notification panel for quick settings access and alerts.

Home Screen Navigation

The LG G3’s home screen is your primary access point, allowing for app organization and widget placement. Utilize folders to group similar applications, enhancing efficiency. Swipe left or right to navigate between multiple home screen panels, customizing each with preferred content. Long-pressing on an empty space enables wallpaper changes and theme selections. The Google search bar at the top facilitates quick searches and voice commands. Customize app icons and layouts for a personalized experience, ensuring frequently used apps are readily accessible. Explore gesture controls for streamlined navigation.

Notification Panel and Quick Settings

Access the notification panel by swiping down from the top of the LG G3’s screen. Here, you’ll find alerts for messages, emails, and app updates. Swipe down again to reveal Quick Settings, providing instant access to frequently used features like Wi-Fi, Bluetooth, and screen brightness. Customize these quick settings to prioritize your preferred controls. Clear notifications individually or all at once. Manage app notification preferences within the settings menu for a tailored experience.

Volume and Power Buttons

Located on the rear of the LG G3, the volume buttons control media playback and ringer volume. Press and hold the power button for approximately 1.5 seconds to activate the device. A long press also accesses power options like restart and power off. The power button also functions as a quick camera launch – double-tap to quickly open the camera application, capturing moments instantly. Be mindful of accidental presses to avoid unintended actions.

Camera Features

The LG G3 boasts versatile camera capabilities, enabling users to capture high-quality photos and videos with diverse settings and shooting modes.

Taking Photos and Videos

The LG G3’s camera app offers intuitive controls for capturing stunning images and videos. To take a photo, simply open the Camera app and tap the large circular shutter button. For video recording, switch to video mode and press the same button.

Explore features like tap-to-focus, enabling precise subject selection, and utilize the volume buttons as a shutter alternative. Experiment with various aspect ratios and image sizes within the settings to tailor your shots. Remember to hold the device steady for clear, focused results.

Camera Settings and Modes

The LG G3 camera boasts diverse settings and modes for creative control. Access these via the settings icon within the Camera app. Explore options like HDR, panorama, and burst shot for varied photography styles. Adjust ISO, white balance, and scene modes to optimize image quality based on lighting conditions.

Further customization includes grid display for composition and the ability to enable location tagging. Experiment with the ‘Magic Focus’ feature for unique post-capture focusing effects, enhancing your photographic possibilities.

Using the Front-Facing Camera

The LG G3’s front-facing camera is perfect for selfies and video calls. Launch the Camera app and switch to the front camera using the icon on the screen. Utilize gesture controls – wave your hand to initiate a timed selfie, ensuring a steady shot.

Adjust settings like flash (screen flash) and beauty mode for enhanced self-portraits. Explore various filters for creative effects. Remember to maintain adequate lighting for optimal image quality when using the front camera.

Connectivity Options

The LG G3 supports Wi-Fi, Bluetooth, and mobile data connections. Easily configure these settings for seamless network access and file transfer capabilities.

Wi-Fi and Bluetooth Setup

Connecting to Wi-Fi is straightforward: navigate to Settings, then Wi-Fi, and select your network. Enter the password if prompted. For Bluetooth, access Settings, then Bluetooth, and enable it to search for nearby devices.

Pairing is simple – select the desired device from the list. Ensure both devices are in pairing mode. The LG G3 manual details troubleshooting steps for connection issues, including verifying network credentials and device compatibility. Remember to keep Bluetooth discoverable for easy pairing.

Mobile Data and Network Settings

To configure mobile data, go to Settings, then Network & Internet, and select Mobile Network. Enable data usage and configure your preferred network type (e.g., 4G/LTE). Access Point Names (APNs) may require manual configuration based on your carrier; consult their documentation.

The LG G3 manual explains how to select network operators and manage roaming settings. Verify data limits to avoid unexpected charges. Network settings also include options for VPNs and tethering, offering flexible connectivity solutions.

USB Connection and File Transfer

Connect your LG G3 to a computer using a USB cable. Upon connection, select the USB mode from the notification panel: options include file transfer (MTP), photo transfer (PTP), or USB tethering. MTP allows seamless transfer of files – photos, videos, documents – between your phone and computer.

The LG G3 manual details troubleshooting steps for connection issues. Ensure the cable is securely connected and drivers are installed on your computer. Properly eject the device before disconnecting to prevent data corruption.

Troubleshooting Common Issues

LG G3 issues like battery drain, connectivity, or app crashes are addressed in the manual. Consult it for solutions and support resources.

Battery Drain Problems

The LG G3 manual offers troubleshooting steps for excessive battery consumption. Begin by checking background app activity and closing unused applications. Adjust display settings, like brightness and screen timeout, to conserve power.

Disable unnecessary features such as Bluetooth and Wi-Fi when not in use. The manual also suggests reviewing battery usage statistics to identify power-hungry apps. Consider enabling battery saver mode for extended runtime, and ensure software is updated for optimal efficiency. If problems persist, a factory reset might be necessary.

Connectivity Issues

The LG G3 manual details solutions for Wi-Fi and Bluetooth connection problems. First, verify network settings and ensure the router is functioning correctly. Toggle airplane mode on and off to refresh the connection. For Bluetooth, confirm pairing mode is active on both devices.

The manual advises checking for software updates, as these often include connectivity fixes. Resetting network settings can also resolve conflicts. If issues continue, consult your internet service provider or LG support for further assistance.

App Freezing or Crashing

The LG G3 manual suggests several troubleshooting steps for app instability. Initially, force stop the problematic application and restart it. Clearing the app’s cache can resolve minor glitches. If freezing persists, try uninstalling and reinstalling the app to obtain a fresh installation.

Ensure the app is updated to the latest version. A system restart can also improve overall performance. If issues continue, a factory reset (after backing up data) might be necessary, as detailed in the manual;

Advanced Settings and Customization

The LG G3 manual details extensive customization options, including display, sound, and security settings, allowing users to personalize their device experience.

Display Settings

The LG G3 manual explains how to adjust display settings for optimal viewing. Users can modify brightness, contrast, and color temperature to suit their preferences. Explore options like adaptive brightness for automatic adjustments based on ambient light. Customize the screen’s color balance and enable or disable features like the reading mode for comfortable prolonged use.

Further personalization includes adjusting font size and style, and selecting a preferred screen timeout duration to conserve battery life. The manual details how to access these settings and fine-tune the display for a visually pleasing experience.

Sound Settings

The LG G3 manual details comprehensive sound customization options. Users can adjust volume levels for various functions – media, ringtones, and notifications – independently. Explore equalizer presets to enhance audio quality for music, movies, or voice. The manual explains how to enable or disable sound effects like surround sound and bass boost.

Further options include configuring the phone’s audio output for headphones or external speakers. Adjust call volume and enable features like noise cancellation for clearer conversations. The manual guides users through these settings for a personalized audio experience.

Security Settings

The LG G3 manual thoroughly explains security features protecting your device and data. Configure screen locks – pattern, PIN, or password – to prevent unauthorized access. Explore options for fingerprint security, if supported by your model. Learn how to manage app permissions, controlling access to sensitive data like contacts and location.

The manual details encryption options for securing your data and remote device management features, allowing you to locate, lock, or wipe your phone if lost or stolen. Understand security policies and best practices for safe usage.

LG G3 Software Updates

The LG G3 manual guides users through checking for and installing software updates, ensuring optimal performance and security enhancements are applied regularly.

Checking for Updates

The LG G3 manual details how to manually check for software updates within the device settings. Navigate to Settings, then About phone, and select Software update. The system will then connect to LG servers to determine if a newer version is available for download.

Ensure a stable Wi-Fi connection during this process. The manual also notes that updates are released periodically to improve performance, fix bugs, and enhance security features. Regularly checking for updates is crucial for maintaining a smooth and secure user experience with your LG G3.

Performing a Software Update

The LG G3 manual instructs users to back up important data before initiating a software update. Once a new version is downloaded, tap “Install now.” The device will restart and begin the update process; do not interrupt this.

Maintaining a stable power source is vital during the update. The manual cautions against turning off the device or removing the battery. Successful updates enhance performance and security. Following these steps ensures a smooth and reliable software upgrade experience on your LG G3.

Factory Reset and Data Backup

The LG G3 manual emphasizes backing up your data before a factory reset to prevent data loss. This restores the phone to its original settings.

Backing Up Your Data

Before performing a factory reset on your LG G3, creating a backup is crucial to safeguard your valuable information. The LG G3 manual details several backup options. You can utilize the LG Backup service, transferring data to your LG account, or employ Google’s backup features for contacts, photos, and app data.

Alternatively, connect your G3 to a computer via USB and manually copy files like photos, videos, and documents. Regularly backing up ensures you won’t lose precious memories or important files during the reset process, allowing for a seamless restoration afterward.

Performing a Factory Reset

A factory reset on your LG G3 restores the phone to its original factory settings, erasing all personal data. The LG G3 manual guides you through this process. Navigate to Settings > General > Backup & Reset > Factory data reset.

Remember to back up your data before proceeding, as this action is irreversible. Confirm your decision, and the phone will reboot, initiating the reset. This resolves software issues but removes all apps, accounts, and files.