omron bp7450 manual

Omron BP7450 Manual: A Comprehensive Guide

Omron’s 10 Series Wireless Bluetooth monitor offers a dual display, storing 200 readings for two users, and includes an Easy-Wrap Comfit Cuff for convenience.

The Omron BP7450 is a sophisticated, user-friendly digital blood pressure monitor designed for convenient home use. As part of the 10 Series, it represents a significant advancement in personal healthcare technology, offering wireless Bluetooth connectivity and advanced data management capabilities. This monitor empowers individuals to proactively manage their cardiovascular health by providing accurate readings and insightful data analysis.

Featuring a horizontally designed dual-display, the BP7450 ensures clear visibility of both systolic and diastolic blood pressure, alongside pulse rate. It’s equipped with a pre-formed Comfit Cuff, designed for easy and comfortable application, accommodating a wide range of arm sizes. The device stores up to 200 readings – 100 per user – facilitating long-term tracking and analysis of blood pressure trends. Ultimately, the Omron BP7450 aims to simplify blood pressure monitoring and promote better health outcomes.

Key Features of the BP7450

The Omron BP7450 boasts several key features enhancing its usability and effectiveness. Wireless Bluetooth connectivity allows seamless data transfer to the Omron Connect app for detailed tracking and analysis on your smartphone. The dual-display design provides clear, simultaneous viewing of systolic, diastolic pressure, and pulse rate.

Its pre-formed Comfit Cuff ensures a comfortable and accurate fit for a broad range of arm circumferences, simplifying the measurement process. The monitor’s memory stores up to 200 readings (100 per user), enabling long-term monitoring of blood pressure trends. Furthermore, the BP7450’s advanced averaging function minimizes the impact of individual variations, providing a more reliable overall assessment of cardiovascular health.

What’s Included in the Box

Upon opening your Omron BP7450 package, you’ll find a comprehensive set of components designed for immediate use and long-term monitoring. The box contains the BP7450 10 Series Wireless Bluetooth Upper Arm Blood Pressure Monitor itself, featuring the horizontally designed dual-display. Included is the pre-formed Easy-Wrap Comfit Cuff, engineered for a secure and comfortable fit on various arm sizes.

You will also receive a set of batteries to power the device, allowing for instant operation. A Quick Start Guide is provided for initial setup and basic operation, while a full Instruction Manual offers detailed guidance on all features and functionalities. Finally, the package includes a warranty card, ensuring peace of mind regarding your purchase.

Setting Up Your BP7450

Setting up your Omron BP7450 involves installing batteries, attaching the Comfit Cuff correctly, and configuring the date and time for accurate tracking.

Installing Batteries

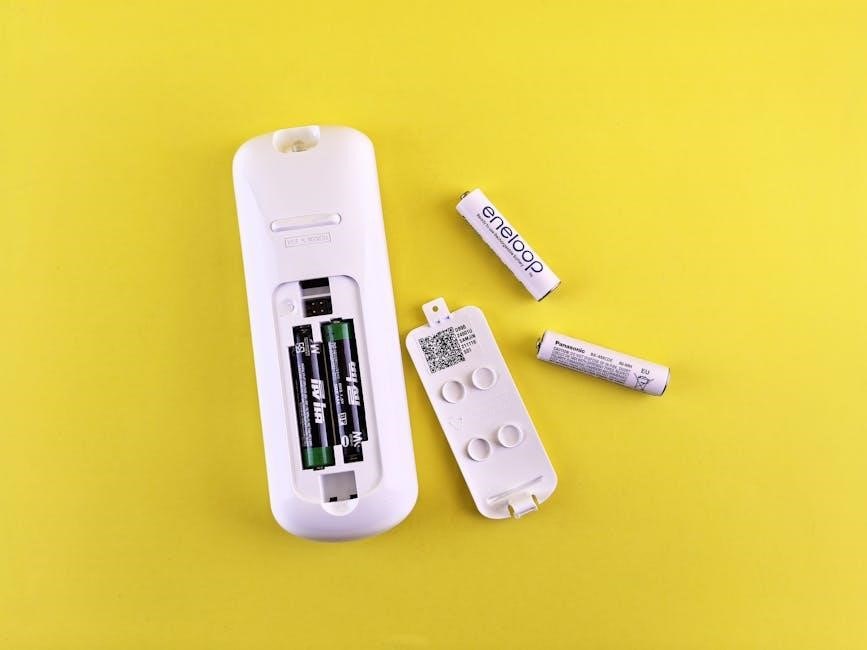
To begin using your Omron BP7450, you’ll need to install the batteries. The monitor requires four AAA batteries, which are not included in the box. Locate the battery compartment, typically on the back or bottom of the unit. Gently slide off the battery cover – do not force it.

Insert the four AAA batteries, ensuring you match the polarity markings (+ and -) inside the compartment. Incorrect battery insertion can damage the monitor and prevent it from functioning correctly. Once the batteries are securely in place, slide the battery cover back on until it clicks shut. The display should illuminate briefly, confirming proper installation. Replace batteries when the low battery indicator appears on the screen for continued accurate readings.

Attaching the Comfit Cuff

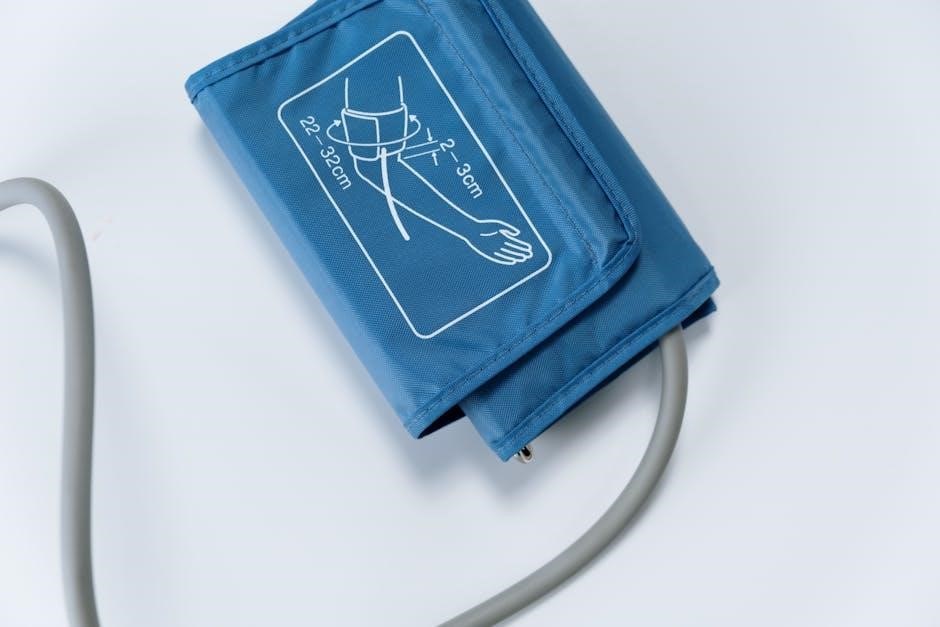
The Omron BP7450 includes a pre-formed Comfit Cuff designed for easy and accurate application. Locate the cuff and the connector tube. Gently insert the connector tube securely into the port on the side of the blood pressure monitor – ensure it’s firmly connected.

Unwrap the cuff and position the artery mark (usually indicated by an arrow) over your upper arm, approximately one inch above your elbow. The cuff should be snug but not too tight, allowing space for a fingertip to slide underneath. Ensure the cuff is applied directly to bare skin, not over clothing. Proper cuff attachment is crucial for obtaining reliable blood pressure measurements.

Date and Time Setting

Accurate date and time settings are essential for correctly tracking your blood pressure readings and utilizing the memory function of the Omron BP7450. To set the date and time, press and hold the ‘Memory’ button until the year digits begin to flash. Use the ‘Start/Stop’ button to adjust the year.

Press ‘Memory’ again to cycle through setting the month, day, hour, and minutes, adjusting each with the ‘Start/Stop’ button. Confirm each setting by pressing the ‘Memory’ button again. Proper date and time ensure accurate timestamping of your measurements, allowing for effective data analysis within the Omron Connect app.

Taking Accurate Blood Pressure Measurements

Consistent technique is vital for reliable results; ensure proper positioning, correct cuff application, and follow the step-by-step measurement procedure carefully each time.

Proper Positioning for Measurement

Achieving accurate blood pressure readings begins with correct positioning. Sit quietly for five minutes before taking a measurement, with your feet flat on the floor and your back supported.

Avoid crossing your legs, as this can elevate blood pressure. Ensure your arm is supported at heart level – a table or armrest works well.

Relax your arm and avoid talking or moving during the measurement process. Proper posture minimizes interference and ensures the BP7450 accurately reflects your blood pressure.

Clothing should not constrict your arm; a light garment is preferable. Taking measurements consistently in the same position will improve the reliability of your readings over time.

Applying the Cuff Correctly

Proper cuff application is crucial for accurate readings with the Omron BP7450. The Comfit cuff should be placed on your upper arm, approximately one inch (2-3 cm) above your elbow.

Ensure the artery mark on the cuff aligns with your brachial artery – typically found on the inner side of your elbow.

The cuff should be snug, but not too tight; you should be able to slide one finger comfortably underneath the edge.

Avoid applying the cuff over clothing, as this can distort the measurement. A correctly applied cuff ensures optimal sensor contact and reliable blood pressure determination.

Measurement Procedure – Step-by-Step

To begin a measurement with your Omron BP7450, sit comfortably with your back supported and feet flat on the floor. Apply the cuff correctly, as previously described, ensuring proper positioning.

Press the ‘Start’ button and remain still and silent throughout the measurement process. Avoid talking or moving during inflation and deflation.

The monitor will automatically inflate the cuff, then slowly deflate while measuring your blood pressure and pulse.

Once complete, the results will be displayed on the screen. Record your readings for tracking and share with your healthcare provider.

Understanding Your Readings

Omron BP7450 displays systolic and diastolic pressure, alongside pulse rate; utilize the 200-reading memory function to track trends and share data.

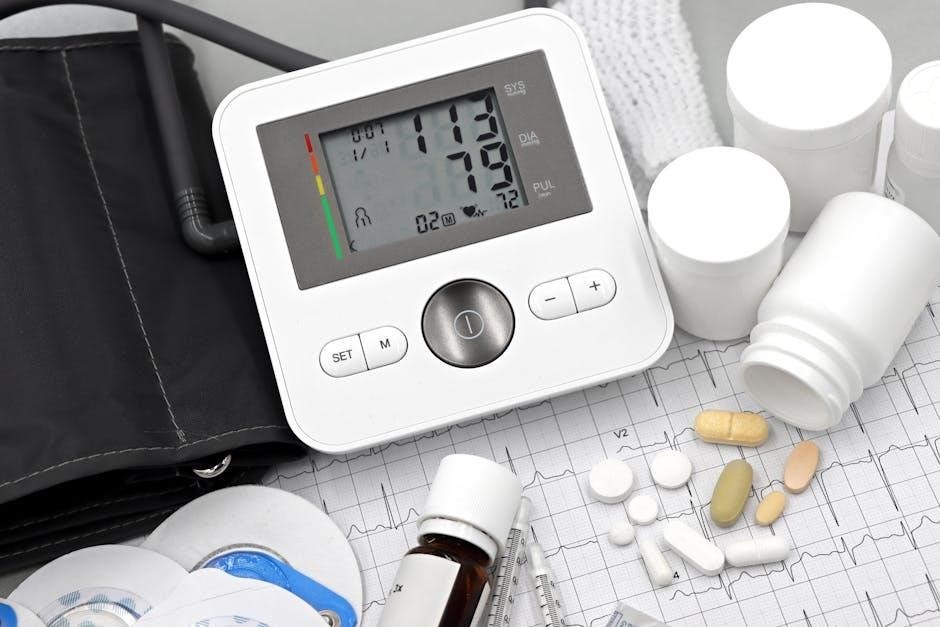
Systolic and Diastolic Pressure Explained

Systolic pressure, the top number in your reading, represents the force your heart exerts when beating. It’s the maximum pressure during contraction. Diastolic pressure, the bottom number, measures the pressure in your arteries when your heart rests between beats – the minimum pressure during relaxation.

Understanding both values is crucial for assessing cardiovascular health. Normal blood pressure generally falls below 120/80 mmHg, but individual targets may vary based on age, health conditions, and doctor recommendations. Consistently high readings indicate hypertension, while low readings might suggest hypotension.

The Omron BP7450 accurately measures both, providing valuable data for monitoring and managing your blood pressure effectively. Regular monitoring, combined with professional medical advice, is key to maintaining optimal heart health.

Pulse Rate Interpretation

Pulse rate, measured in beats per minute (BPM), indicates how many times your heart beats each minute. The Omron BP7450 accurately displays your pulse alongside blood pressure readings, offering a comprehensive health snapshot.

A normal resting pulse rate typically ranges from 60 to 100 BPM, though this can vary based on fitness level, stress, medication, and overall health. Athletes often have lower resting pulse rates. Elevated pulse rates may indicate stress, dehydration, or underlying medical conditions, while significantly low rates could signal bradycardia.

Tracking pulse rate alongside blood pressure provides a more complete picture of cardiovascular function. Consistent monitoring with the BP7450 helps identify trends and informs discussions with your healthcare provider.

Memory Function and Data Storage (200 Readings)

The Omron BP7450 boasts a robust memory function, capable of storing up to 200 readings – 100 readings per user when utilized by two individuals. This feature allows for convenient tracking of blood pressure trends over time, aiding in a more informed understanding of your cardiovascular health.

Stored data includes both systolic and diastolic blood pressure values, alongside the corresponding pulse rate and date/time of each measurement; Easily recall past readings directly on the device, facilitating comparisons and identification of potential fluctuations.

Regularly reviewing stored data, and sharing it with your physician, can contribute to more effective blood pressure management and personalized healthcare decisions.

Bluetooth Connectivity and Omron Connect App

Omron’s BP7450 utilizes Bluetooth for seamless data transfer to the Omron Connect app, enabling detailed analysis and convenient health tracking.

Pairing with Your Smartphone

To establish a Bluetooth connection between your Omron BP7450 and your smartphone, first ensure Bluetooth is enabled on your mobile device. Download and install the Omron Connect app from the App Store (iOS) or Google Play Store (Android). Open the app and follow the on-screen instructions to create an account or log in.

Within the Omron Connect app, navigate to the device pairing section. Power on your BP7450; it will automatically enter pairing mode. The app will then search for available devices. Select “BP7450” from the list of discovered devices. You may be prompted to enter a pairing code, typically displayed on the monitor. Once successfully paired, the app will confirm the connection, allowing for seamless data synchronization.

Data Synchronization and Analysis

Once paired, the Omron Connect app automatically synchronizes blood pressure readings from your BP7450 to your smartphone via Bluetooth. This process typically occurs when the app is open and within range of the monitor. Within the app, you can view your readings in a clear, chronological format, presented as graphs and charts.

The Omron Connect app provides detailed analysis of your blood pressure data, including average readings, trends over time, and comparisons to established guidelines. It allows you to track your progress, identify potential health concerns, and share reports with your healthcare provider. Customizable reports can be generated for specific date ranges, offering a comprehensive overview of your cardiovascular health.

Benefits of Using the Omron Connect App

The Omron Connect app significantly enhances the BP7450 experience by providing a centralized hub for managing and understanding your blood pressure data. It facilitates effortless tracking of readings over time, enabling you to identify patterns and potential issues. Sharing data with your physician becomes streamlined, fostering more informed healthcare discussions.

Beyond simple data transfer, the app offers personalized insights and medication reminders, promoting proactive health management. Visual trends and detailed reports empower you to take control of your cardiovascular well-being. The app’s user-friendly interface makes navigating your health information simple and accessible, supporting a healthier lifestyle.

Troubleshooting Common Issues

Addressing potential problems like error messages, inaccurate readings, or cuff fit issues ensures optimal performance and reliable blood pressure monitoring with your BP7450.

Error Messages and Their Meanings

The Omron BP7450 utilizes error messages to alert users to potential issues during operation. Understanding these codes is crucial for accurate readings and device maintenance. An “Err” display often indicates a problem with the cuff connection or inflation. If “Cuff Err” appears, re-apply the cuff, ensuring it’s securely attached and within the arm circumference guidelines.

“Movement Err” signals body movement during measurement; remain still for accurate results. A “Low Battery” message prompts immediate battery replacement to avoid inaccurate readings. Should the device display an unusual error not listed in the manual, consult Omron’s support website or contact customer service for assistance. Ignoring error messages can lead to unreliable data and compromise health monitoring.

Inaccurate Readings – Potential Causes

Several factors can contribute to inaccurate blood pressure readings with the Omron BP7450. Incorrect cuff size is a primary concern; ensure the Comfit cuff fits your arm circumference properly. Improper positioning – sitting with unsupported back or crossed legs – can elevate readings. Movement during measurement, talking, or even fidgeting will affect accuracy, so remain still.

External factors like caffeine, smoking, or recent exercise can temporarily raise blood pressure. A loose or incorrectly applied cuff will also yield unreliable results. Regularly check battery levels, as low power can impact performance. If consistently inaccurate readings persist, consult your healthcare provider to rule out underlying medical conditions.

Cuff Fit Problems and Solutions

Proper cuff fit is crucial for accurate BP7450 readings. The included Comfit cuff is designed for standard arm sizes, but incorrect fit is common. If the cuff is too small, it will cause artificially high readings, while a too-large cuff results in lower readings. Measure your arm circumference to ensure it falls within the cuff’s specified range.

Solutions include purchasing a different sized cuff if necessary – Omron offers various sizes. Ensure the cuff is applied snugly, but not too tightly, about one inch above your elbow. The artery marker on the cuff should align with your brachial artery. If you struggle with self-application, ask someone for assistance. A secure, correctly positioned cuff is essential for reliable results.

Maintenance and Care

Regular cleaning with a soft, damp cloth ensures longevity. Replace batteries as needed and store the monitor in a cool, dry place, away from direct sunlight.

Cleaning the Monitor and Cuff

To maintain the accuracy and hygiene of your Omron BP7450, regular cleaning is essential. Always disconnect the cuff from the monitor before cleaning. For the monitor itself, gently wipe the exterior with a soft, slightly damp cloth. Avoid using harsh chemicals, abrasive cleaners, or excessive water, as these can damage the device.

The Comfit cuff can be cleaned similarly. Use a mild detergent diluted in water, and gently wipe the cuff’s surface. Rinse thoroughly with a clean, damp cloth to remove any soap residue. Allow both the monitor and cuff to air dry completely before reassembling or storing. Do not machine wash or dry the cuff, as this could compromise its functionality and fit. Proper cleaning contributes to the longevity and reliable performance of your blood pressure monitor.

Battery Replacement Guidelines

The Omron BP7450 operates on batteries, and timely replacement is crucial for accurate readings. The monitor typically indicates low battery with a warning symbol on the display. Use four size AA alkaline batteries – do not mix old and new batteries, or different battery types. Always replace all four batteries at the same time for optimal performance.

To replace the batteries, locate the battery compartment (usually on the back or bottom of the unit). Open the compartment cover and insert the new batteries according to the polarity markings (+ and -). Ensure the batteries are securely seated. Dispose of used batteries responsibly, following local regulations. Consistent battery replacement ensures uninterrupted monitoring of your blood pressure.

Storage Instructions

Proper storage extends the lifespan of your Omron BP7450 and maintains its accuracy. When not in use, store the monitor in a cool, dry place, away from direct sunlight, extreme temperatures, and humidity. Avoid storing it in locations prone to dust or excessive vibration.

The cuff should also be stored carefully, avoiding sharp bends or creases that could damage the tubing or sensor. It’s best to keep the monitor and cuff together in a protective case or bag, if available. Do not store the device with the batteries installed for prolonged periods, as leakage could occur. Following these guidelines ensures your monitor remains in optimal condition for years of reliable use.

gm engine codes list pdf

GM engine codes‚ often found in PDF lists‚ are crucial for vehicle identification and parts sourcing. These alphanumeric sequences unlock a wealth of information about an engine’s origin and specifications.

What are GM Engine Codes?

GM engine codes are alphanumeric identifiers stamped directly onto the engine block‚ typically located near the front or side. These codes serve as a unique “fingerprint” for each engine‚ detailing its original configuration as it left the factory. Finding a comprehensive gm engine codes list PDF is essential for deciphering these markings.

The codes aren’t simply random; they’re meticulously structured to convey specific information. They reveal the engine family‚ engine type‚ assembly plant‚ and production date. Accessing a reliable PDF resource containing these codes allows enthusiasts and mechanics to accurately identify an engine’s specifications without disassembly. These codes are vital for restoration projects‚ parts compatibility checks‚ and verifying engine authenticity.

Why are GM Engine Codes Important?

GM engine codes are paramount for several reasons‚ making a readily available gm engine codes list PDF invaluable. They ensure accurate parts ordering‚ preventing costly mistakes and guaranteeing compatibility. Knowing the code confirms the engine’s original specifications‚ crucial for classic car restoration and maintaining originality.

Furthermore‚ these codes help identify potential engine swaps or modifications. A PDF guide allows verification of whether an engine is truly what it’s claimed to be‚ protecting against fraud. Mechanics rely on these codes for accurate diagnostics and repair procedures. Ultimately‚ understanding GM engine codes empowers owners and professionals alike‚ fostering informed decisions regarding maintenance‚ performance upgrades‚ and vehicle valuation.

Decoding GM Engine Codes: The Basics

Decoding GM engine codes‚ often detailed in a PDF list‚ involves understanding the alphanumeric sequence. Each character reveals specific engine attributes and manufacturing details.

The 8th Character: Engine Family

The 8th character within a GM engine code is pivotal‚ directly indicating the engine family. A PDF engine code list will clearly define these designations. For instance‚ a ‘P’ typically signifies a Buick engine‚ while ‘Q’ denotes an Oldsmobile. Understanding this character narrows down the engine’s core design and potential components. This is a foundational step when referencing a comprehensive GM engine codes list in PDF format.

Identifying the engine family is crucial for accurate parts matching and restoration projects. Many PDF resources categorize codes by engine family‚ simplifying the search process. Knowing the family allows enthusiasts to focus on compatible components and avoid costly mistakes. Detailed GM engine codes lists‚ often available as PDF downloads‚ provide this essential information‚ enabling precise identification and informed decision-making.

The 9th Character: Engine Type

The 9th character in a GM engine code specifies the engine type within its family. A reliable GM engine codes list PDF will detail these variations. For example‚ within a Small Block Chevy family‚ different letters denote 2-barrel‚ 4-barrel‚ or fuel-injected configurations. This character is vital for pinpointing the exact engine variant. Consulting a PDF resource streamlines this process‚ offering a clear breakdown of each code.

Accurately identifying the engine type is essential for selecting the correct carburetor‚ intake manifold‚ or other performance parts. A comprehensive GM engine codes list in PDF format provides this crucial detail. This level of specificity ensures compatibility and optimal engine performance. Utilizing these PDF guides prevents incorrect part selection and simplifies restoration or modification projects.

Understanding RPO Codes

RPO (Regular Production Option) codes are supplemental to GM engine codes‚ found alongside them in vehicle documentation and often detailed within a comprehensive GM engine codes list PDF. These codes specify factory-installed options‚ including engine specifics not fully captured in the engine code itself. A PDF resource clarifies how RPOs complement the primary engine code.

Decoding RPOs‚ alongside the engine code‚ provides a complete picture of the original engine configuration. A detailed GM engine codes list PDF will translate these RPOs into understandable features like specific cylinder heads‚ transmissions‚ or cooling systems. This information is invaluable for restoration projects‚ ensuring authenticity. Accessing a well-organized PDF simplifies the decoding process‚ aiding in accurate vehicle identification and parts sourcing.

Common GM Engine Code Lists & Resources (PDF Focus)

Numerous GM engine codes list PDF resources are available online‚ offering detailed breakdowns of engine identification. These PDF guides are essential for enthusiasts.

Locating Reliable GM Engine Code PDF Lists

Finding trustworthy GM engine codes list PDF documents requires careful sourcing. Many online forums and classic car communities host compiled lists‚ often created and vetted by experienced enthusiasts. However‚ verifying the accuracy of these sources is paramount. Official GM documentation‚ when available‚ provides the most reliable information‚ though it can be harder to locate in PDF format.

Websites specializing in automotive repair manuals frequently offer downloadable PDFs containing engine code information. Be cautious of sites with excessive advertising or unclear origins. Reputable automotive parts retailers sometimes provide PDF guides to aid in parts compatibility‚ utilizing engine codes for accurate identification. Always cross-reference information from multiple sources to ensure consistency and avoid errors when using a GM engine codes list PDF.

Key Information Found in GM Engine Code PDFs

A comprehensive GM engine codes list PDF typically decodes the alphanumeric string‚ revealing crucial details. Expect to find the engine family (the basic engine design)‚ engine type (specific variation within the family)‚ and assembly plant location. Date codes indicate the month and year of manufacture‚ aiding in determining originality. PDFs often include RPO (Regular Production Option) codes‚ detailing factory-installed equipment and features.

Furthermore‚ these lists clarify suffix codes‚ which pinpoint specific production variations and internal component differences. A good GM engine codes list PDF will correlate these codes with engine specifications like horsepower‚ torque‚ and compression ratio. Understanding this information is vital for accurate restoration‚ performance upgrades‚ and ensuring parts compatibility when referencing a GM engine codes list PDF.

Navigating Complex GM Engine Code Charts

GM engine codes list PDF charts can appear daunting due to the sheer volume of information. Start by focusing on the core components: the 8th and 9th characters‚ representing engine family and type. Cross-reference these with a reliable GM engine codes list PDF to narrow down possibilities. Pay close attention to suffix codes‚ as they denote specific variations.

Many charts include RPO code tables; utilize these to confirm factory specifications. When using a GM engine codes list PDF‚ remember that variations exist across model years. Digital PDFs often offer search functionality‚ streamlining the process. Don’t hesitate to consult online forums and communities for clarification when interpreting complex GM engine codes list PDF data.

Specific GM Engine Families & Their Codes

GM engine codes list PDF resources detail families like Small Block Chevy‚ LS‚ and Vortec. Decoding these requires referencing specific PDF charts for accurate identification.

Small Block Chevy (SBC) Engine Codes

Small Block Chevy (SBC) engine codes‚ extensively documented in various GM engine codes list PDF guides‚ are foundational for classic car enthusiasts and restorers. These codes‚ typically found stamped on the engine block‚ reveal critical details about the engine’s original configuration. A PDF will often break down the code into sections‚ identifying the year‚ assembly plant‚ and horsepower rating.

Common SBC codes include those for the 283‚ 305‚ 327‚ and 350 cubic inch engines. Decoding these requires a reliable PDF resource‚ as variations exist across model years. For example‚ a 350 code might indicate a 1970 model built in Flint‚ with a specific compression ratio. These PDF lists are invaluable for verifying engine authenticity during restoration projects and ensuring correct parts selection.

Big Block Chevy (BBC) Engine Codes

Big Block Chevy (BBC) engine codes‚ readily available in comprehensive GM engine codes list PDF documents‚ are essential for identifying these powerful engines. These codes‚ stamped on the block‚ provide insights into the engine’s displacement (typically 396‚ 402‚ 427‚ or 454 cubic inches)‚ horsepower‚ and original application. A detailed PDF guide will dissect each character‚ revealing the assembly plant and production date.

Decoding BBC codes requires specialized PDF resources‚ as they are more complex than SBC codes. For instance‚ a code might signify a 454 LS6 engine from 1970‚ known for its high performance. These PDF lists are crucial for verifying the authenticity of classic muscle cars and ensuring accurate restoration. Correct parts sourcing relies heavily on accurately interpreting these BBC engine codes found within the PDF.

GM LS Engine Codes (Popular Performance Engines)

GM LS engine codes‚ extensively detailed in GM engine codes list PDF guides‚ are vital for enthusiasts and mechanics alike. The LS family (LS1‚ LS2‚ LS3‚ LS7‚ etc.) is renowned for its performance potential‚ and the engine code reveals critical specifications. A PDF resource will decode the 8th and 9th characters‚ indicating the engine family and type‚ respectively. These codes pinpoint horsepower ratings‚ cylinder head configurations‚ and intended vehicle applications.

Locating a reliable PDF is key to understanding LS variations. These PDF lists help verify engine swaps‚ ensure parts compatibility‚ and confirm originality. Decoding these codes allows for informed decisions when building or maintaining a performance LS engine. Accessing a comprehensive GM engine codes list PDF is the first step towards unlocking the full potential of these popular engines.

GM Vortec Engine Codes

GM Vortec engine codes‚ readily available in detailed GM engine codes list PDF documents‚ are essential for identifying these powerful truck and SUV engines. Vortec engines (L31‚ L32‚ LQ4‚ etc.) are known for their robust design and torque output. A comprehensive PDF guide deciphers the alphanumeric code stamped on the engine block‚ revealing crucial details about its specifications and origin.

These PDF resources break down the code’s components‚ clarifying the engine family‚ type‚ and assembly plant. Understanding Vortec codes is vital for parts sourcing‚ engine rebuilds‚ and verifying engine swaps. A reliable GM engine codes list PDF ensures accurate identification and compatibility. Accessing these PDF lists empowers owners and mechanics to maintain and modify these durable engines effectively.

Interpreting Specific Code Components

GM engine codes list PDF guides detail how to decode suffix‚ date‚ and assembly plant codes‚ revealing production specifics and manufacturing timelines for each engine.

Suffix Codes: Production Date & Specifics

Suffix codes‚ prominently featured in a GM engine codes list PDF‚ are the final alphanumeric characters appended to the core engine code. These aren’t random; they pinpoint the exact production date and reveal crucial specifics about the engine’s original configuration. Decoding these suffixes requires referencing detailed charts within these PDF resources.

For instance‚ a suffix might indicate the month and day of manufacture‚ the assembly plant where the engine was built‚ or even specific internal component variations. Understanding these nuances is vital for restoration projects or when sourcing correct replacement parts. A comprehensive PDF will break down each suffix‚ offering a clear translation of its meaning. Ignoring these codes can lead to incorrect parts ordering and compatibility issues‚ highlighting the importance of accurate decoding using reliable GM engine codes list PDF guides.

Date Codes: Manufacturing Information

Date codes‚ meticulously detailed within a GM engine codes list PDF‚ provide a precise timeline of an engine’s creation. These codes aren’t simply about the year; they often specify the month‚ week‚ and even the shift during which the engine was assembled. Accessing a reliable PDF is essential for deciphering these complex sequences.

This granular level of detail is invaluable for verifying engine authenticity‚ especially when dealing with classic or collectible vehicles. A GM engine codes list PDF will typically include a key explaining how to interpret these date codes. Knowing the manufacturing date can also help determine potential design revisions or known issues associated with specific production runs. Accurate interpretation‚ guided by a comprehensive PDF‚ ensures correct restoration and maintenance practices.

Assembly Plant Codes

Assembly plant codes‚ clearly outlined in a comprehensive GM engine codes list PDF‚ pinpoint the exact facility where the engine was built. These codes‚ typically letters‚ correspond to specific General Motors manufacturing locations throughout history. A detailed PDF is crucial for accurate decoding‚ as plant assignments changed over time.

Knowing the assembly plant can offer insights into potential quality control variations or specific production characteristics associated with that facility. This information is particularly useful for restoration projects or when researching the engine’s provenance. A well-maintained GM engine codes list PDF will provide a complete directory of plant codes and their corresponding locations‚ aiding in a thorough engine identification process.

GM Engine Codes & Performance Applications

A GM engine codes list PDF helps identify performance engines‚ ensuring correct parts selection for builds and swaps‚ maximizing compatibility and power.

Identifying High-Performance Engine Codes

Utilizing a comprehensive GM engine codes list PDF is paramount when seeking high-performance engines. Certain codes consistently denote factory-built engines designed for superior output. For instance‚ specific suffixes within Chevrolet small-block codes often indicate higher compression ratios‚ aggressive camshaft profiles‚ and enhanced cylinder head flow characteristics.

These PDF resources detail codes associated with engines found in models like the Corvette‚ Camaro‚ and Pontiac GTO‚ frequently featuring performance upgrades. Decoding the RPO (Regular Production Option) codes‚ also detailed in these lists‚ reveals factory-installed performance packages. Recognizing these codes allows enthusiasts and mechanics to accurately identify engines originally intended for demanding applications‚ aiding in restoration‚ modification‚ or accurate parts replacement. Careful study of these GM engine codes list PDF documents is essential.

Using Engine Codes for Parts Compatibility

A detailed GM engine codes list PDF is indispensable for ensuring correct parts compatibility. Engines appearing similar can have subtle‚ yet critical‚ differences impacting component interchangeability. The engine code precisely identifies these variations – cylinder head bolt patterns‚ piston designs‚ and connecting rod lengths are just a few examples.

Referring to these PDF resources prevents costly mistakes when ordering replacement parts or performance upgrades. Incorrect components can lead to engine damage or reduced performance. The code confirms the exact specifications of the engine‚ guaranteeing the selected parts will fit and function correctly. Utilizing a GM engine codes list PDF streamlines the parts selection process‚ saving time and frustration‚ and ensuring optimal engine health and performance.

Engine Code Variations & Modifications

Even with a comprehensive GM engine codes list PDF‚ understanding variations is vital. Factory modifications‚ often implemented mid-year‚ can alter an engine’s specifications despite retaining a similar base code. These changes might involve upgraded components or revised calibrations. A PDF list provides a starting point‚ but supplemental research is often necessary.

Furthermore‚ aftermarket modifications complicate matters. Swapped engines or altered components invalidate the original code’s accuracy. A GM engine codes list PDF won’t reflect these changes. Thorough documentation of any modifications is crucial for accurate identification and parts selection. Recognizing these nuances ensures correct diagnosis‚ repair‚ and performance tuning‚ even when relying on detailed PDF resources.

Resources for Further Research

Numerous online databases and GM engine codes list PDF resources exist. The GM Heritage Center and automotive forums offer valuable insights and decoding assistance.

Online GM Engine Code Databases

Several websites specialize in compiling and organizing GM engine codes‚ often offering searchable databases and downloadable PDF lists. These resources are invaluable for enthusiasts and mechanics alike‚ providing a centralized location to decipher complex engine markings. Many platforms allow users to input specific code sequences and receive detailed information regarding the engine’s family‚ type‚ production date‚ and assembly plant;

Furthermore‚ some databases incorporate user-submitted data‚ creating a collaborative environment for refining accuracy and expanding coverage. While these online tools are incredibly helpful‚ it’s crucial to cross-reference information with official GM engine codes list PDF documents whenever possible to ensure reliability. Always verify data from multiple sources before making critical decisions based on engine code interpretations.

GM Heritage Center Resources

The GM Heritage Center provides a wealth of historical information‚ including original documentation related to GM engine codes. While a single comprehensive PDF list may not be readily available for direct download‚ the center offers access to archived build sheets‚ technical manuals‚ and engineering drawings. These resources often contain the necessary data to decode engine markings and understand their significance.

Researchers can request specific information or explore digitized collections to uncover details about particular engine families and their associated codes. Accessing these primary sources offers unparalleled accuracy and context‚ surpassing information found on many third-party websites. Utilizing the Heritage Center’s resources is essential for verifying engine authenticity and understanding original factory specifications‚ complementing any PDF lists found elsewhere.

Automotive Forums & Communities

Automotive forums and online communities dedicated to GM vehicles are invaluable resources for deciphering GM engine codes. Members frequently share scanned PDF lists‚ deciphered code meanings‚ and personal experiences with engine identification. These platforms often host extensive threads discussing specific engine families and their variations‚ offering practical insights beyond official documentation.

However‚ it’s crucial to verify information obtained from forums‚ as accuracy can vary. Cross-referencing data with official sources and reputable websites is recommended. Many experienced enthusiasts contribute to these communities‚ creating a collaborative environment for understanding complex engine codes and locating hard-to-find PDF resources. Active participation can unlock a wealth of knowledge.

Troubleshooting with GM Engine Codes

GM engine codes‚ detailed in PDF lists‚ aid in identifying potential engine swaps or verifying a vehicle’s original configuration for accurate repairs.

Identifying Engine Swaps Using Codes

GM engine codes‚ readily available in comprehensive PDF lists‚ become invaluable tools when investigating potential engine swaps. A mismatch between the vehicle’s original code – often found on the engine block or in documentation – and the code currently present strongly suggests an engine replacement. These PDF resources allow quick cross-referencing to determine if the installed engine is factory-correct for the vehicle’s year and model.

Furthermore‚ discrepancies in date codes or assembly plant codes‚ as detailed within these PDF guides‚ can pinpoint when and where the swapped engine was originally manufactured. This information is critical for assessing compatibility with existing vehicle systems and ensuring proper operation. Careful examination of these codes‚ using reliable PDF lists‚ can reveal if the swap involved an upgrade‚ downgrade‚ or simply a replacement with a similar engine variant.

Verifying Engine Authenticity

GM engine codes‚ meticulously documented in readily accessible PDF lists‚ are paramount when verifying the authenticity of a classic or collectible vehicle’s engine. These codes‚ stamped directly onto the engine block‚ should align precisely with the information presented in trusted PDF resources for the specific year‚ model‚ and original equipment configuration.

Discrepancies – such as an incorrect suffix code‚ date code‚ or assembly plant code as detailed in these PDF guides – can indicate a non-original engine. Thoroughly comparing the engine’s markings against a reliable PDF list helps determine if the engine is a factory replacement‚ a period-correct substitute‚ or a later addition; This verification process is crucial for maintaining a vehicle’s historical accuracy and value‚ relying heavily on the detailed information contained within these PDF documents.

Decoding Codes for Repair Purposes

GM engine codes‚ conveniently compiled in comprehensive PDF lists‚ become invaluable tools during engine repair and restoration. These codes pinpoint original specifications‚ ensuring the correct parts are used‚ avoiding costly compatibility issues. A PDF allows quick reference to determine factory-installed components like cylinder heads‚ carburetors‚ and internal engine parts.

When sourcing replacements‚ referencing a PDF list confirms the correct part number for the specific engine code. This is especially critical for maintaining originality or upgrading with period-correct performance parts. Detailed PDF resources also reveal production dates and assembly plant information‚ aiding in accurate diagnosis and repair. Utilizing these PDF guides streamlines the repair process‚ guaranteeing a faithful restoration or reliable rebuild.

The Future of GM Engine Code Information

GM engine code data‚ including PDF lists‚ is increasingly digitized‚ fostering community-driven databases for enhanced accessibility and preservation of this vital automotive history.

Digitalization of GM Records

The transition of GM’s historical records to digital formats represents a significant leap forward for enthusiasts and researchers. Previously‚ accessing detailed engine information often required scouring through physical archives or relying on fragmented‚ often incomplete‚ PDF lists circulating online. Now‚ initiatives are underway to systematically scan and catalog original build sheets‚ engineering documents‚ and crucially‚ comprehensive GM engine code lists.

This digitalization effort promises to create a centralized‚ searchable database‚ vastly improving the accuracy and accessibility of engine identification data. The availability of these digitized records will not only benefit those restoring classic vehicles but also aid in verifying engine authenticity and tracing production histories. Expect more readily available‚ official PDF resources detailing GM engine codes‚ reducing reliance on potentially inaccurate third-party compilations.

Community-Driven Engine Code Databases

Alongside GM’s digitalization efforts‚ a vibrant community of automotive enthusiasts is actively building and maintaining collaborative engine code databases. These platforms often leverage crowdsourced information‚ supplementing official GM engine code lists found in PDF format with real-world observations and corrections. Users contribute data from engine castings‚ vehicle build sheets‚ and personal research‚ creating a dynamic and evolving resource.

These community databases frequently offer features beyond simple code lookup‚ including forums for discussion‚ image galleries of engine stamps‚ and tools for decoding complex RPO options. While verifying information remains crucial‚ these platforms provide a valuable supplement to official PDF resources‚ offering a broader perspective and filling gaps in existing documentation. They represent a powerful example of collective knowledge benefiting the automotive community.

Posted in PDF

ge universal remote 41567 manual

GE Universal Remote 41567: A Comprehensive Manual Guide

This guide details the GE UltraPro 8-Device Backlit Universal Remote (41567), streamlining your entertainment with features like dedicated streaming hotkeys and advanced DVR controls.

The GE 41567 UltraPro Universal Remote Control is designed to simplify your home entertainment experience, consolidating control of multiple devices into one convenient unit. This 8-device remote is compatible with a wide range of brands, including Samsung, Roku TV, Vizio, LG, Sony, Sharp, and Apple TV, offering broad usability. It features a backlit display for easy viewing in low-light conditions and dedicated buttons for quick access to streaming services.

Beyond basic functions, the GE 41567 boasts a Blu-ray/DVD player open/close button and advanced DVR capabilities, enhancing its functionality. As of today, April 15, 2026, GE operates as three independent companies – GE Aerospace, GE Vernova, and GE HealthCare – following recent corporate restructuring. GE.com now directs users to these individual company websites for specific information and support.

What’s Included in the Box

Upon opening the GE 41567 UltraPro Universal Remote package, you will find the remote control unit itself, designed with a sleek, black finish. Included is a comprehensive user manual, detailing setup instructions, programming methods (auto-search and manual code entry), and explanations of each button’s function. The box also contains the necessary batteries to power the remote, allowing for immediate use upon purchase.

Notably, there are no additional accessories such as HDMI cables or device-specific adapters included. The focus is solely on providing a fully functional remote and clear guidance for its operation. Remember that GE has undergone significant changes, now operating as GE Aerospace, GE Vernova, and GE HealthCare, with updated websites for each entity. Support information can be found through these new channels.

Setting Up Your GE 41567 Remote

Begin by installing the included batteries, then program the remote using either the auto-search or manual code entry method for seamless device control.

Initial Battery Installation

To begin using your GE 41567 Universal Remote, you’ll first need to install the batteries. Locate the battery compartment on the back of the remote control. Typically, a sliding cover will need to be removed to access the battery space.

Insert the required batteries – usually two AAA or AA batteries (refer to the remote’s packaging for specifics) – ensuring correct polarity. Match the positive (+) and negative (-) ends of the batteries with the markings inside the compartment.

Once the batteries are securely in place, replace the battery compartment cover. The remote should now power on, indicated by the backlight illuminating briefly or a response on your TV screen when you press a button. If the remote doesn’t power on, double-check the battery installation and ensure the batteries are fresh.

Device Compatibility: Supported Brands

The GE 41567 UltraPro Universal Remote boasts broad compatibility, designed to control a wide array of home entertainment devices. It readily supports major television brands including Samsung, Vizio, LG, Sony, and Sharp. Beyond TVs, it extends control to streaming players like Roku and Apple TV.

Furthermore, this remote is capable of operating Blu-ray and DVD players, adding to its versatility. While a comprehensive list isn’t always provided, the remote’s programming capabilities – through auto-search or manual code entry – allow it to function with numerous other brands not explicitly listed.

Successful operation depends on the device having a compatible infrared (IR) receiver and being included within the remote’s extensive code library. Check GE’s support resources for the most up-to-date compatibility information.

Programming the Remote: Auto-Search Method

The Auto-Search method offers a convenient way to program your GE 41567 Universal Remote without needing specific codes. Begin by powering on the device you wish to control. Then, press and hold the ‘Setup’ button until the indicator light illuminates. Next, press the ‘Power’ button repeatedly, pausing briefly after each press, while aiming the remote at the device.

The remote will send power signals to the device during this process. When the device responds (turns off or on), immediately press the ‘Setup’ button again to lock in the code. Test functionality with volume and channel controls.

If the device doesn’t respond after several attempts, repeat the process. This method systematically cycles through codes until a compatible one is found, offering a user-friendly programming experience.

Programming the Remote: Manual Code Entry

For manual code entry, first, locate the code list for your device brand – often available online or within the remote’s documentation. Power on the device you intend to control. Press and hold the ‘Setup’ button until the indicator light turns on. Then, enter the five-digit code corresponding to your device’s manufacturer using the number pad.

After entering the code, the indicator light should blink, confirming code acceptance. Test the functionality by attempting to control the device with commands like volume up/down or channel change. If the remote doesn’t work, try a different code from the list for your brand.

Ensure accurate code entry for successful programming. This method provides precise control and is useful when the auto-search fails to find a compatible code.

Understanding the Remote’s Buttons & Features

The GE UltraPro boasts a full backlit display, dedicated streaming app access, and convenient controls for Blu-ray players, DVRs, and sub-channels.

Power, Input, and Number Pad Functions

The Power button, unsurprisingly, controls the on/off function of your connected devices. A single press typically activates or deactivates the selected TV, DVD player, or streaming device. The Input button allows you to cycle through the available input sources on your television – HDMI 1, HDMI 2, Component, and so on. Repeated presses will navigate through these options, displaying them on your screen.

The number pad (0-9) serves multiple purposes. Primarily, it’s used for direct channel selection on traditional television broadcasts. However, it also plays a crucial role during the programming process, specifically when manually entering device codes. Furthermore, some streaming services and devices utilize the number pad for PIN entry or navigating on-screen menus. Ensure accurate input for optimal functionality. These core functions provide essential control over your home entertainment setup;

Volume and Channel Control

Volume control is managed via the dedicated Volume Up (+) and Volume Down (-) buttons, allowing for precise audio adjustments. These buttons typically function across multiple devices, controlling the sound output of your TV, soundbar, or receiver. Channel control is similarly straightforward, utilizing the Channel Up (CH+) and Channel Down (CH-) buttons to navigate through available television channels.

For direct channel access, the number pad can be employed, as previously mentioned. Some devices may also support a ‘favorite’ channel function, accessible through a dedicated button or menu option. It’s important to note that the responsiveness of these controls can vary depending on the device being controlled and the programming configuration. Proper code entry ensures optimal functionality and seamless channel surfing.

Navigation and Menu Buttons

The GE 41567 remote features intuitive navigation controls centered around the circular directional pad (Up, Down, Left, Right). These buttons facilitate movement within on-screen menus and selection of options on smart TVs and streaming devices. At the center of the directional pad lies the OK or Select button, confirming choices and initiating actions.

The Menu button provides access to the main settings and options of the connected device, allowing users to customize their viewing experience. A Back or Return button enables easy navigation back to previous screens. These buttons work in conjunction with the on-screen display, offering a user-friendly interface for managing device settings and content. Proper functionality relies on correct device programming.

Dedicated Streaming App Hotkey

The GE 41567 Universal Remote includes a dedicated streaming app hotkey, designed for quick and direct access to your primary streaming service. This button, prominently placed on the remote, bypasses menu navigation, launching your preferred app – such as Netflix, Hulu, or Amazon Prime Video – with a single press.

Initial setup may require programming this hotkey to the specific streaming service you use most frequently. The remote’s manual details the programming process, often involving a code entry or auto-search function. This feature streamlines the entertainment experience, eliminating the need to scroll through multiple apps to find your favorite content. Enjoy instant access to streaming entertainment!

Blu-ray/DVD Player Control (Open/Close)

The GE 41567 UltraPro remote conveniently incorporates dedicated buttons for controlling your Blu-ray or DVD player, including a specific “Open/Close” function. This eliminates the need to search for the player’s remote when ejecting or inserting discs. The button’s functionality is universal, working with a wide range of Blu-ray and DVD player brands, simplifying your home theater setup.

Programming is typically straightforward, utilizing either the auto-search or manual code entry methods detailed in the remote’s manual. Ensure the remote is correctly programmed for your specific player model to guarantee seamless operation. This feature adds a layer of convenience, making disc management effortless and enhancing the overall viewing experience.

Advanced DVR Functions

The GE 41567 UltraPro remote boasts advanced functionality for Digital Video Recorder (DVR) control, enhancing your television viewing experience. This includes dedicated buttons for navigating recorded programs, accessing the DVR menu, and managing your recordings with ease. Features like fast-forward, rewind, pause, and play are readily available, streamlining content access.

Programming the remote for DVR control requires selecting the correct code corresponding to your DVR’s manufacturer. The manual provides a comprehensive code list and instructions for both auto-search and manual entry methods. Successful programming unlocks features like series recording, instant replay, and efficient management of your digital television library, offering a user-friendly interface.

Sub-Channel Access (Dot Button)

The GE 41567 UltraPro remote includes a dedicated “dot” button, providing convenient access to sub-channels offered by your local television broadcasters. This feature is particularly useful for accessing additional programming options beyond the main network channels, such as weather updates, local news, or specialized content.

Utilizing the dot button is straightforward: simply press it while tuned to a digital television channel. This will cycle through any available sub-channels associated with that broadcast signal. The remote’s compatibility with digital television standards ensures reliable sub-channel access, expanding your viewing choices. This feature enhances the overall television experience, offering a wider range of content without requiring complex menu navigation.

Troubleshooting Common Issues

If the remote isn’t responding, check batteries or re-program. Incorrect codes or programming difficulties can also occur; refer to the manual for solutions.

Remote Not Responding

If your GE 41567 Universal Remote suddenly stops responding, begin with the simplest checks. First, ensure the batteries are fresh and correctly installed, paying attention to the polarity markings (+ and -). Even new batteries can sometimes be faulty, so testing with a known working set is advisable.

Next, verify there are no obstructions between the remote and the device you’re trying to control. While universal remotes utilize infrared (IR) technology, physical barriers can interfere with the signal.

If the issue persists, attempt to reset the remote. While a dedicated reset button isn’t typically present, removing the batteries for several minutes can often resolve minor glitches. After reinserting the batteries, re-program the remote for your specific device following the instructions in the “Programming the Remote” section of this manual. If problems continue, consult the full manual or GE support.

Incorrect Code Entered

Experiencing issues after entering a device code for your GE 41567 remote? It’s a common occurrence. Universal remotes rely on extensive code libraries, and finding the exact match can sometimes require trial and error. If the initial code doesn’t work, don’t assume the remote is faulty.

Consult the code list provided with your remote or available online at GE’s support resources. Often, multiple codes are listed for the same brand; systematically try each one. After entering a code, test the essential functions – power, volume, and channel changing – to confirm success.

If none of the listed codes function correctly, utilize the auto-search method. This process automatically cycles through codes until a working one is found. Remember to point the remote directly at the device during code entry and testing for optimal signal transmission.

Difficulty Programming Specific Devices

Encountering trouble programming certain devices with your GE 41567 Universal Remote? Some devices, particularly newer models or those from less common brands, can present programming challenges. The extensive code library doesn’t always immediately include support for the very latest technology.

First, double-check the device’s brand and model number against the remote’s code list. If your device isn’t listed, the auto-search function becomes crucial. Be patient, as this process can take time. Ensure a clear line of sight between the remote and the device during the search.

For streaming devices like Roku or Apple TV, utilize the dedicated streaming app hotkey for simplified setup. If problems persist, consult GE’s online support resources or contact their customer service for assistance with specific device compatibility.

Backlight Malfunction

If the backlight on your GE 41567 Universal Remote isn’t functioning, several potential causes should be investigated. First, confirm the batteries are fresh and correctly installed, as low battery power can often affect backlight operation. Try replacing them with a brand-new set.

Next, check if the backlight is accidentally switched off. Some models feature a dedicated backlight button or a setting within the menu. Ensure this feature is enabled. If the issue persists, a more significant problem might exist within the remote’s internal circuitry.

Unfortunately, repairing the backlight yourself is generally not recommended. Contacting GE support is the best course of action to explore warranty options or potential replacement solutions. A malfunctioning backlight hinders usability, especially in low-light conditions.

Advanced Features & Customization

Explore macro programming capabilities (if available) and personalize your viewing experience by adjusting the backlight brightness to your preferred level for optimal comfort.

Macro Programming (If Applicable)

The GE 41567 UltraPro remote may support macro programming, allowing you to combine multiple commands into a single button press for simplified control of your home entertainment system. This feature, if present, enables automation of complex sequences, such as powering on devices, switching inputs, and starting playback – all with one touch.

To initiate macro programming, consult the full user manual (available online at GE’s support resources) for specific instructions, as the process varies depending on the remote’s firmware version. Typically, it involves entering a learning mode, recording the desired sequence of button presses, and then assigning those commands to a designated macro button.

Remember to save your macro configurations securely, as accidental overwrites can occur. Macro functionality significantly enhances convenience, especially for users with multiple connected devices and frequently used command combinations. If your remote doesn’t support macros, explore alternative customization options like adjusting backlight settings.

Adjusting Backlight Brightness

The GE 41567 UltraPro remote features a backlit display designed for easy visibility in low-light conditions. To optimize your viewing experience, you can adjust the backlight brightness to your preference. This customization ensures comfortable operation without causing excessive glare or draining battery power unnecessarily.

Typically, backlight brightness is adjusted using a dedicated button or a combination of buttons on the remote itself. Refer to the comprehensive user manual – accessible through GE’s support website – for precise instructions specific to your remote’s model. The manual will detail the steps to cycle through different brightness levels, ranging from off to maximum intensity.

Experiment with various settings to find the ideal balance between visibility and battery life. Lowering the brightness can significantly extend battery duration, while increasing it enhances readability in dark environments. Regularly check GE’s website for firmware updates that may introduce additional customization options.

GE Company Information & Support

GE has transitioned into three independent companies: GE Aerospace, GE Vernova, and GE HealthCare, each with dedicated websites for support and information.

GE Aerospace, GE Vernova, GE HealthCare – Current Company Structure

General Electric (GE) has undergone a significant transformation, completing the spin-offs into three independent, publicly traded companies in 2024. This restructuring aims to unlock greater value and focus within each business sector. GE Aerospace focuses on the aviation industry, encompassing jet engines and aircraft services. GE Vernova concentrates on the energy sector, including power, wind, and electrification technologies. Finally, GE HealthCare is dedicated to medical imaging, monitoring, and diagnostics.

These separations mean that GE.com now serves as a portal directing users to the individual company websites – GE Aerospace (geaerospace.com), GE Vernova, and GE HealthCare. Previously unified support channels are now segmented, requiring customers to identify the relevant company for their specific needs. This change impacts inquiries related to products like the GE 41567 Universal Remote, as support now falls under the legacy GE structure during the transition.

GE.com Updates and Redirects

GE.com has been substantially updated following the separation into three independent companies: GE Aerospace, GE Vernova, and GE HealthCare. The website now functions primarily as a redirect hub, guiding visitors to the appropriate standalone company site based on their area of interest. Previously, GE.com served as a central resource for all GE products and services, including support documentation for devices like the GE 41567 Universal Remote.

Currently, direct links to specific product support pages, such as a dedicated manual for the 41567 remote, may be outdated or redirect to a general contact form. Users seeking information on the remote are advised to search directly on retail websites like Amazon or eBay, where archived product details and user manuals are often available. The transition is ongoing, and GE encourages users to utilize the new company-specific websites for the most accurate and up-to-date information.

Contacting GE Support for Assistance

Due to the recent restructuring of GE into GE Aerospace, GE Vernova, and GE HealthCare, direct support for legacy products like the GE 41567 Universal Remote is now complex. GE.com redirects to the new company sites, and dedicated support for older consumer electronics is limited. Finding assistance requires identifying the appropriate contact point, which may not be immediately obvious.

For the 41567 remote, the best approach is to initially consult the retailer where the device was purchased (e.g., Amazon). If that fails, explore the GE Aerospace website’s general contact directory, specifically looking for customer support options. Be prepared to provide detailed product information. Alternatively, online forums and user communities dedicated to universal remotes often offer troubleshooting advice and shared manuals. Direct phone support for this specific model is increasingly difficult to locate, emphasizing self-service resources.

ear piercing size guide

Ear Piercing Size Guide: A Comprehensive Overview

Navigating the world of ear piercings requires understanding sizing; unfortunately, websites sometimes face limitations, hindering immediate access to crucial information.

Understanding Gauge and Millimeters

When discussing ear piercing sizes, two primary measurement systems are used: gauge and millimeters. Gauge refers to the diameter of the piercing jewelry, but it operates on a reverse scale – a lower gauge number indicates a thicker piece of jewelry. This can be initially confusing! Millimeters, conversely, provide a straightforward linear measurement of the jewelry’s diameter.

Understanding both systems is vital for accurate communication with your piercer and for selecting appropriate jewelry. Many piercers are proficient in both, allowing for seamless adjustments and ensuring a comfortable fit. Knowing the difference empowers you to actively participate in the process and advocate for your body’s needs during and after piercing.

The American Wire Gauge (AWG) System

The American Wire Gauge (AWG) system, originally developed for electrical wiring, is commonly adopted for measuring piercing jewelry thickness. It’s a logarithmic scale, meaning the diameter increases disproportionately as the gauge number increases. For example, the jump from a 16g to a 14g represents a significant increase in jewelry thickness.

Common piercing gauges range from 20g (thinnest, often for initial lobe piercings) to 0g (thickest, used for stretched lobes or larger gauge piercings). Familiarizing yourself with these numbers helps you understand jewelry descriptions and discuss sizing preferences with your piercer. Remember, lower numbers equal thicker jewelry!

Converting Gauge to Millimeters

While the AWG system is prevalent, millimeters (mm) offer a more intuitive understanding of jewelry diameter. Converting between the two is essential for accurate sizing, especially when ordering jewelry online or communicating with piercers internationally. A 20g piercing equates to approximately 0.8mm in diameter, while a 16g is around 1.2mm.

As the gauge decreases (jewelry gets thicker), the millimeter measurement increases. A 14g is roughly 1.6mm, and a 12g measures about 2.0mm. Online conversion charts are readily available, but understanding the general relationship between gauge and millimeters empowers you to make informed decisions about your piercings.

Standard Ear Piercing Sizes by Location

Different ear piercings necessitate varying jewelry sizes due to anatomical differences and healing considerations. Lobe piercings, being the most common, typically start with 16g or 18g jewelry, ranging from 12mm to 19mm in length. Helix piercings generally utilize 16g or 18g studs, with post lengths between 6mm and 10mm.

More complex piercings like tragus and conch require precise measurements. Tragus piercings often use 16g or 18g jewelry with lengths of 6mm-8mm, while conch piercings can vary significantly, needing 16g or 14g with lengths from 6mm to 10mm. Accurate sizing is crucial for comfort and proper healing.

Lobe Piercings: Common Sizes

Lobe piercings, being the most versatile, accommodate a range of jewelry gauges and lengths. Initially, most piercers utilize 18g needles, resulting in jewelry of the same gauge. Post lengths typically fall between 10mm and 12mm for standard lobes, ensuring comfortable wear and room for swelling during healing.

However, lobe size can vary based on individual anatomy and preference. Some individuals opt for 16g jewelry for a slightly thicker appearance. Lengths can extend to 19mm or even longer for stretched lobes. Choosing the correct length prevents irritation and promotes healthy healing, allowing for diverse jewelry styles.

Helix Piercings: Recommended Gauges

Helix piercings, located on the upper cartilage, generally require thinner jewelry than lobe piercings. A 16g or 18g needle is commonly used for initial piercing, with corresponding jewelry gauges. Barbell lengths typically range from 6mm to 8mm, depending on the thickness of the cartilage and desired fit.

Shorter lengths minimize snagging, while longer lengths provide more room for swelling. Curved barbells or rings are popular choices, but ensure they are appropriately sized to avoid pressure points. Cartilage is less forgiving than lobes, so precise sizing is crucial for comfortable healing and preventing migration.

Forward Helix Piercings: Size Considerations

Forward helix piercings, situated at the front curve of the cartilage, present unique sizing challenges. Due to the limited space and often thinner cartilage, 16g or even 18g jewelry is frequently recommended. Barbell lengths are typically shorter, ranging from 5mm to 7mm, to accommodate the area’s anatomy.

Careful consideration must be given to the post length; too long, and it will protrude noticeably, while too short can cause irritation. Curved barbells or small rings are common choices, but ensure a snug, comfortable fit. A skilled piercer will assess your cartilage thickness for optimal sizing.

Tragus Piercings: Optimal Gauge and Length

Tragus piercings, located on the small flap of cartilage protecting the ear canal, require precise sizing for comfort and proper healing. Typically, a 16g or 18g gauge is used, as the tragus cartilage is relatively thin. Barbell lengths generally fall between 6mm and 8mm, though this varies based on individual anatomy.

Shorter lengths are preferred to prevent irritation of the ear canal. Curved barbells are commonly used, conforming to the tragus’s shape. A professional piercer will carefully measure to ensure the jewelry doesn’t apply undue pressure or impede movement. Initial jewelry material is also crucial for successful healing.

Conch Piercings: Inner and Outer Conch Sizes

Conch piercings, categorized as inner or outer, necessitate different jewelry sizing considerations. Outer conch piercings, placed on the flat cartilage, generally utilize 16g jewelry with post lengths ranging from 6mm to 10mm, depending on cartilage thickness. A stud is a common choice for this placement.

Inner conch piercings, situated closer to the ear canal, often require a larger gauge – typically 14g – and slightly longer post lengths, around 8mm to 12mm. Curved barbells can also be used. Accurate measurement by a skilled piercer is vital to avoid pressure points and ensure comfortable healing;

Rook Piercings: Gauge and Length Details

Rook piercings, traversing the inner cartilage fold, demand precise jewelry sizing for optimal comfort and healing. Typically, a 16g or 14g needle is used for the initial piercing. Jewelry length is crucial, generally ranging from 6mm to 8mm for curved barbells. Shorter lengths can cause pressure, while longer lengths may lead to migration.

The anatomy of the rook varies significantly between individuals, necessitating a careful assessment by a professional piercer. They will consider the cartilage thickness and the desired fit to determine the appropriate length. Downsizing may be recommended once initial swelling subsides.

Daith Piercings: Size for Comfort and Healing

Daith piercings, located within the innermost cartilage fold, require careful consideration of both gauge and diameter for a comfortable and successful healing process. A 16g or 14g needle is commonly used for the initial piercing. Jewelry diameter typically ranges from 6mm to 8mm, utilizing a captive bead ring or a circular barbell.

Due to the unique curvature of the daith, precise measurement is vital. Too small a diameter can cause pressure and impede blood flow, while too large a diameter risks migration. A skilled piercer will assess your anatomy and recommend the ideal size, potentially adjusting it during healing.

Industrial Piercings: Bar Length and Gauge

Industrial piercings, spanning two points on the upper cartilage, demand precise sizing for optimal comfort and to avoid undue pressure. Typically, a 14g barbell is used, offering sufficient strength and a relatively comfortable fit. Determining the correct bar length is crucial; it must accommodate the distance between the entry and exit points without being overly tight or loose.

Lengths generally range from 32mm to 40mm, but individual anatomy dictates the ideal size. A piercer will accurately measure the distance and add a few millimeters to allow for swelling during healing. Avoid excessively long bars, as they increase the risk of snagging and migration.

Materials and Their Impact on Size

The material of your piercing jewelry significantly influences both comfort and the apparent size needed. Different materials possess varying levels of biocompatibility and can affect healing. Surgical steel, a common choice, is durable and affordable, but some individuals experience sensitivities. Titanium, renowned for its hypoallergenic properties, is ideal for sensitive skin and often recommended for initial piercings.

Gold, particularly 14k or 18k, offers a luxurious option, but purity matters to minimize allergic reactions. Acrylic and Bioplast are frequently used for initial piercings due to their flexibility and lightweight nature, aiding in comfortable healing. Material choice can subtly alter the required gauge or length.

Surgical Steel: A Common Choice

Surgical steel remains a widely utilized material for ear piercings due to its affordability and robust durability. Typically, it’s an alloy containing iron, chromium, nickel, and sometimes molybdenum. The chromium content provides corrosion resistance, a key factor for body jewelry. However, the presence of nickel is a potential concern for those with sensitivities, potentially causing allergic reactions or delayed healing;

While generally safe, individuals with known nickel allergies should opt for hypoallergenic alternatives like titanium. Surgical steel is available in various gauges and is suitable for many initial and established piercings, offering a balance between cost and quality.

Titanium: Hypoallergenic Options

For individuals with metal sensitivities, titanium emerges as a superior choice in ear piercing jewelry. This biocompatible metal is exceptionally lightweight, strong, and completely free of nickel – a common allergen found in surgical steel. Its inherent hypoallergenic properties minimize the risk of adverse reactions, promoting faster and more comfortable healing, especially for initial piercings.

Titanium is available in implant-grade options (ASTM F-136), ensuring the highest purity and safety standards. While generally more expensive than surgical steel, the investment is worthwhile for those prone to allergies or seeking optimal healing conditions. It’s suitable for all piercing locations.

Gold: Karat and Purity Considerations

Gold, a classic choice for jewelry, requires careful consideration regarding karat and purity when selecting ear piercing adornments. Higher karat gold (24k) is softer and more prone to bending, making it less ideal for piercings. 14k or 18k gold offers a balance of durability and gold content. However, pure gold is often alloyed with other metals, potentially including nickel, which can cause allergic reactions.

Opt for 14k or 18k yellow gold, as white gold often contains nickel. Verify the gold is nickel-free and sourced from a reputable supplier. While aesthetically pleasing, gold isn’t always the best initial piercing material due to potential alloy sensitivities.

Acrylic and Bioplast: Initial Piercing Materials

Acrylic and Bioplast are frequently recommended for initial ear piercings, particularly for those with sensitivities. These materials are hypoallergenic, lightweight, and affordable, minimizing irritation during the crucial healing phase. Bioplast, a medical-grade plastic, is exceptionally biocompatible and flexible, reducing pressure on the piercing site.

Acrylic, while less flexible than Bioplast, offers a wide range of colors and styles. Both materials are non-porous, preventing bacteria buildup. However, avoid low-quality acrylics, as they can harbor bacteria. They are excellent temporary options before transitioning to metals like titanium or gold.

Measuring Your Existing Piercing

Accurately measuring your existing piercing is vital when replacing jewelry or assessing healing progress. A piercing gauge tool, readily available online or at piercing shops, provides the most precise measurement. Simply insert different gauge wires until you find one that snugly fits the piercing.

If a gauge tool isn’t accessible, a ruler can offer an estimate. Carefully measure the visible portion of the jewelry, excluding decorative ends. Remember this is less accurate. Document your findings; knowing your gauge and length prevents future complications. Always prioritize professional guidance for initial sizing or if unsure.

Using a Piercing Gauge Tool

A piercing gauge tool is the gold standard for determining your jewelry size with precision. These tools consist of a series of wires, each representing a different gauge. Start with a larger gauge wire and gently attempt to insert it through your piercing.

If it slides through easily, move to a smaller gauge. The correct gauge is the one that offers slight resistance but passes through without excessive force. Note the corresponding gauge number. For accurate length measurement, use a ruler alongside the gauge tool. This method minimizes errors and ensures a comfortable, well-fitting replacement.

Estimating Size with a Ruler

While a piercing gauge tool is preferred, a ruler can offer a reasonable estimate when one isn’t available. Carefully remove your jewelry and lay it flat against a ruler with millimeter markings. Measure the visible portion of the post or bar, excluding any decorative ends.

For gauge, approximate using conversion charts (gauge to millimeters); Remember, this method is less precise and prone to error. Always prioritize professional measurement for accurate sizing, especially when changing piercings or experiencing discomfort. A slight inaccuracy can impact healing and comfort.

Downsizing and Upsizing Piercings

Adjusting piercing size, whether downsizing or upsizing, requires careful consideration and professional guidance. Downsizing is often necessary after initial healing as swelling subsides, preventing migration and ensuring a snug fit. This is crucial for long-term stability. Upsizing, while less common, might be desired for comfort or aesthetic reasons.

However, rapid or excessive upsizing can strain the piercing and potentially cause damage. Always consult a reputable piercer before making any size changes. They can assess your anatomy and recommend appropriate adjustments, minimizing risks and promoting healthy healing.

The Importance of Downsizing

Downsizing your initial piercing jewelry is a critical step in the healing process and long-term health of your piercing. The jewelry initially inserted is often slightly larger to accommodate swelling. As the swelling reduces, larger jewelry can move around excessively, irritating the piercing channel and increasing the risk of migration or rejection.

Downsizing to a properly fitted piece of jewelry provides stability, encourages the skin to heal tightly around the jewelry, and minimizes potential complications. A professional piercer can guide you on the appropriate timing and size for downsizing, ensuring a smooth and successful transition.

Safe Upsizing Practices

While downsizing is crucial for initial healing, carefully considered upsizing can enhance comfort and aesthetic appeal once a piercing is fully healed. However, rushing the process or upsizing too dramatically can cause irritation and even damage the piercing.

Upsizing should be gradual, increasing the jewelry size in small increments. Always choose high-quality materials to minimize allergic reactions. Monitor the piercing closely for any signs of irritation, redness, or migration. If discomfort arises, revert to the previous size and consult a professional piercer. Patience and professional guidance are key to safe and successful upsizing.

Factors Affecting Piercing Size Needs

Determining the correct piercing size isn’t one-size-fits-all; several individual factors significantly influence optimal jewelry dimensions. Anatomy plays a crucial role, as ear shapes and cartilage thickness vary greatly between individuals. Initial swelling post-piercing necessitates larger jewelry to accommodate inflammation and prevent pressure.

Even after the initial healing phase, individual healing responses differ, impacting long-term size requirements. Furthermore, the specific piercing location dictates appropriate gauge and length. Considering these variables ensures comfort, promotes proper healing, and minimizes the risk of complications. Consulting a skilled piercer is vital for personalized sizing recommendations.

Anatomy and Individual Variation

The human ear exhibits remarkable anatomical diversity, profoundly impacting ideal piercing sizes. Cartilage thickness, a key factor, varies significantly from person to person, influencing gauge selection. Ear shape, including curvature and lobe size, also dictates appropriate jewelry length and style.

These inherent differences mean a “standard” size rarely exists. What works perfectly for one individual may be unsuitable for another. Ignoring these anatomical nuances can lead to discomfort, improper healing, or even rejection. A professional piercer assesses these unique characteristics to recommend jewelry that complements your specific ear structure, ensuring a safe and aesthetically pleasing result.

Swelling During Healing

Post-piercing swelling is a natural physiological response, significantly affecting initial jewelry sizing. The body’s inflammatory reaction to the trauma causes tissues around the piercing to expand. Jewelry must accommodate this swelling to prevent pressure, irritation, and potential complications like infection or delayed healing.

Initially fitted jewelry is typically slightly larger to allow for this expansion. As swelling subsides during the healing process, downsizing becomes crucial. This prevents migration and ensures the jewelry remains comfortably and securely in place. Ignoring swelling and wearing too-tight jewelry can impede blood flow and prolong healing, so patience and proper aftercare are essential.

Finding a Reputable Piercer

Selecting a skilled and experienced piercer is paramount for a safe and successful piercing experience, directly impacting appropriate sizing. A reputable piercer prioritizes hygiene, utilizing sterile equipment and following strict cross-contamination protocols. They possess in-depth knowledge of anatomy and piercing techniques, ensuring correct placement and jewelry selection.

Don’t hesitate to research piercers, checking portfolios and reading reviews. A consultation is vital; discuss your desired piercing, potential sizing options, and aftercare instructions. A professional piercer will patiently answer your questions and guide you toward the best choice for your anatomy and lifestyle, avoiding future sizing issues.

Importance of Professional Piercing

Opting for a professional piercing significantly minimizes risks and ensures optimal healing, directly influencing long-term jewelry sizing. Attempting self-piercing or utilizing untrained individuals can lead to infection, improper placement, and scarring, complicating future size adjustments. Professionals utilize sterile, single-use equipment, adhering to strict hygiene standards to prevent complications.

Their expertise guarantees accurate placement, crucial for comfort and aesthetic appeal. A skilled piercer assesses your anatomy to determine the appropriate jewelry gauge and length, avoiding unnecessary pressure or migration. Investing in a professional piercing is an investment in your health and the longevity of your piercing, setting the stage for correct sizing.

Discussing Size with Your Piercer

Open communication with your piercer is paramount when determining the ideal jewelry size. Don’t hesitate to express any concerns or preferences regarding gauge and length; they are equipped to guide you. Discuss your anatomy, lifestyle, and desired aesthetic to ensure a comfortable and visually pleasing fit.

Ask about the initial jewelry material and its impact on swelling. Understand the potential for downsizing and the importance of proper aftercare. A reputable piercer will explain the reasoning behind their recommendations, empowering you to make informed decisions about your piercing size and future adjustments.

Aftercare and Size Adjustments

Diligent aftercare is crucial for successful healing and may influence future size adjustments. Following your piercer’s instructions regarding cleaning and handling minimizes swelling and irritation, allowing for accurate assessment of the final fit. Initial jewelry is often slightly larger to accommodate swelling; downsizing is typically recommended once healed.

Be patient and avoid premature changes. If you experience persistent discomfort or notice signs of infection, consult your piercer immediately. They can evaluate the piercing and advise on appropriate adjustments or treatment. Remember, proper aftercare and professional guidance are key to a comfortable, long-lasting piercing.

Proper Aftercare for Optimal Healing

Consistent and gentle aftercare is paramount for a smooth healing process and preventing complications; Clean the piercing twice daily with a sterile saline solution – avoid harsh soaps, alcohol, or hydrogen peroxide. Gently rotate the jewelry during cleaning to prevent adhesion, but avoid excessive movement.

Keep the area dry and avoid touching it with unwashed hands. Protect the piercing from trauma, like snagging on clothing, and refrain from swimming in pools or natural bodies of water during initial healing. A healthy lifestyle, including adequate sleep and nutrition, also supports optimal healing.

When to Consult Your Piercer About Size

Don’t hesitate to reach out to your piercer if you experience persistent discomfort or suspect an incorrect size. Significant swelling, redness, or prolonged pain beyond the initial few days warrants professional evaluation. If jewelry feels too tight, causing indentation or restricting movement, or too loose, posing a snagging risk, seek advice.

Changes in the piercing’s appearance, like excessive migration or rejection, also necessitate a piercer’s assessment. They can accurately evaluate the situation and recommend appropriate adjustments, downsizing, or alternative jewelry options to ensure continued healing and prevent complications.